Guide
Fashion tutorial for beginners: making espadrilles
by Vanessa Kim

In the "DIY fashion for beginners" series, Anne and I show you how to sew fashion pieces or salvage clothes. In today's episode: How to print a motif with a cutting plotter.
My DIY on fabric bags left a few questions unanswered. Many wanted to know what the ominous gold print on the bag was all about. [[image:22213351]]
Anne and I don't want to keep how this works from you. The solution to the puzzle: a hobby plotter.
I don't know about you, but until now I had no idea what a cutting plotter was. The electronic device looks like a printer and uses a blade to cut patterns and shapes out of paper, cardboard or fabric.
For this you need:

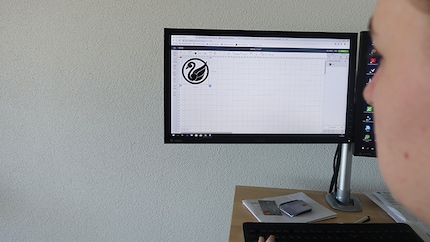
Before actually printing, look for a suitable motif. Every cutting plotter manufacturer offers motifs on their website that you can download (some of them for free). Or, like Anne, you can design your own logo. After much deliberation, we decide in favour of her brand logo as a test print. Please note: You must always draw and plot your design mirror-inverted. [[image:22186595,22186614]]
Now spread out a plotter film in your desired colour in front of you and cut out a rectangle from it on which your motif has enough space. [[image:22188531,22188535]]
Place this rectangle on a cutting plate in the hobby plotter. The carrier foil (the shiny side) faces downwards. Now let the machine do the work. [[image:22188560]]
Use a plotter spade to carefully remove the unnecessary spaces from the sticker. This requires a certain amount of dexterity and, depending on the print, a little patience. [[image:22188585,22188586]]
Once you have finished your work, remove the entire motif from the film. Your self-printed motif is finished and can be ironed onto any fabric. We opted for the self-sewn fabric bag. [[image:22189508,22189525]]
To remove creases and residual moisture from the fabric, start by briefly ironing the fabric. Now place the motif with the matt side facing down on the fabric bag or an item of clothing of your choice. Then cover the whole thing with a cover sheet. Do not place the fabric on a padded ironing board, but on a granite or wooden board. Press the iron onto the film for ten seconds. Be careful, there is a risk of unintentionally moving the motif. Then allow the whole thing to cool briefly before carefully removing the film. Finally, press the cover sheet on again by hand for a few seconds so that the motif adheres firmly to the fabric.
For a large logo, the manufacturer recommends that you first press on individual sections with the iron and then iron in a circle over the edge. Caution: Some foils need to be removed while still warm (follow the instructions). [[image:22189592]]
Your self-made textile print is ready. If you're wondering whether the item is washable, I can reassure you. I asked myself the same question. It's best to wait 48 hours before putting the garment or fabric bag in the washing machine. When washing, turn the garment inside out and wash it at 30° Celsius. You should also iron it inside out. The only downside: tumble drying is taboo.
Here you can find all cutting plotters.
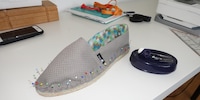
In our next episode, we'll show you how to sew espadrilles. If you want more fashion DIYs on your radar, follow me by clicking the button on my author profile.
When I’m not exploring the depths of the sea as an open water diver, I enjoy plunging into the world of fashion. On the streets of Paris, Milan and New York is where I keep my eyes peeled for the latest trends. And I’ll show you how to take them from the catwalk to your everyday life.
Practical solutions for everyday problems with technology, household hacks and much more.
Show all