Guide
Last-minute hack: how to save a mediocre gift
by Stephanie Vinzens

In the "DIY for beginners" series, Vanessa and I show you how to recreate fashionable clothes or save your old ones. In today's episode: how to make espadrilles.
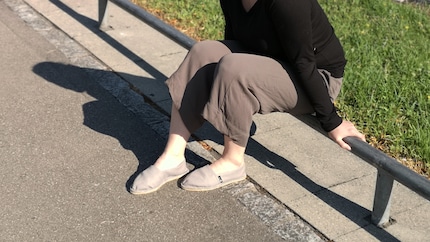
I've spent many summers trying to love sandals. Tried, because they always squeeze my feet and give me blisters every other time. Until I developed a taste for espadrilles. This trendy fabric shoe with a jute sole is, in my opinion, the most comfortable summer shoe there is. Vanessa and I will show you how to sew your pair.
What you need:
The first thing to do is choose a fairly sturdy fabric like denim or linen. This time, for a change, you can follow the pattern: it comes with soles and instructions. Cut out the pattern, pin it to the fabric and cut the fabric, leaving a 1 cm seam allowance. We now have eight pieces of fabric: four pieces for the top of the foot (two for the lining and two for the outer fabric) and four pieces for the heel (two for the lining and two for the outer fabric). [[image:26856961 "Prym jute sole",26856966 "An upper foot"]]
Vanessa and I chose two richly contrasting fabrics for the outer and lining. Layer the outer fabric and lining fabric right sides together and secure with pins. [[image:26857704]] Upper foot and heel
Next, sew 1cm from the edge. Don't forget to leave an opening (see pattern) so you can turn the two parts of the shoe inside out. This opening measures approximately 5 cm. Block the seam at both ends to prevent it from opening. Next, cut the seam inset diagonally at the corners and notch the rounded edges using the notched chisel. [[image:26857816 "Diagonal cutting",26857815 "The opening and top of foot after the cut"]]
The zigzag cut prevents the edge of the fabric from fraying. Please note: do not shorten the seam allowance along the 5 cm opening. We need this once we've turned the piece inside out. [[image:26857905]] Help with making angles
Now turn the fabric inside out through the opening. Using a corner-making aid, shape the corners and seams, then press to mark the seams.
Close the opening by hand or using a sewing machine. The last option looks a little more professional. To do this, simply topstitch the four pieces of fabric. In other words, stitch 2 mm along the edges.
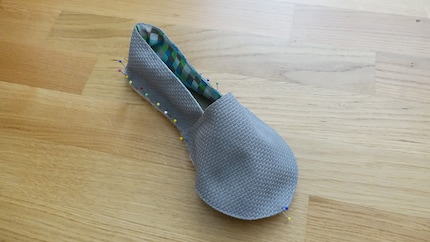
Now place the two pieces of fabric for the left and right shoe on top of each other so that the top of the foot overlaps the heel part by about 1.5 cm. Secure with pins and sew together using the machine. Repeat these steps for the other shoe. [[image:26858075 "Place the top of the foot over the heel part....",26858089 "and machine stitch."]] [[image:26872679]] View of the back after sewing.
Now begins the tedious part, for which we strongly recommend using a thimble. You'll thank us later for this "trick". On the sole, place a pin to mark the middle of the heel and toes. Do the same for the fabric. To do this, simply fold it lengthways. This way you know exactly where to attach the fabric to the sole. [[image:26875039,26875040]] On the sole and fabric, mark the middle of the heel and foot.
Now place the two places with the pins on top of each other and pin the fabric to the sole. When you stitch the upper onto the sole make sure to "hold", the fabric as shown in the pattern at the front of the foot. This allows you to leave more room for your foot.

If you value your fingers, or rather your fingertips, it's time to thread the thimble. Take an embroidery thread - or a sturdy, thick thread - about 2.5m long (or shorter if you prefer to work with a shorter thread) and tie a knot at the end. Using the scallop stitch, sew the fabric to the sole. To do this, pass the needle through the fabric and the sole. As the thread is under the needle, a loop is formed. This secures the edge. Make sure the stitches are evenly spaced for a better finish. The thread should be tightened firmly, but not too tightly, so that the edge of the fabric does not curl or distort. [[image:26878358]] Festoon stitch
Once you've gone all the way around the sole, tuck the end of the thread in, tie a knot and cut it off. A little tip: to make sure you enjoy your creation for a long time, don't wear your espadrilles when it's raining. The sole absorbs water quickly. Since I switched to this type of summer shoe, I've had blister-free summers.

In our next episode, we'll show you how to sew a pair of wrap trousers. If you don't want to miss out on any fashion tutorials, follow my author profile.
When I’m not exploring the depths of the sea as an open water diver, I enjoy plunging into the world of fashion. On the streets of Paris, Milan and New York is where I keep my eyes peeled for the latest trends. And I’ll show you how to take them from the catwalk to your everyday life.
Practical solutions for everyday problems with technology, household hacks and much more.
Show all