
Guide
Quickly made: DIY paper vase as a gift idea
by Pia Seidel

All it takes is 5 simple steps to turn ordinary sandals into a floral dream. And don’t worry about your shoes. They’ll be fine. The flowers are removable.
Flowers are a big thing in fashion right now – and this goes beyond prints. In their three-dimensional form, fabric and plastic flowers add tangible highlights to clothes and accessories. While Loewe’s gone for oversized anthuriums in the shape of tops, Elie Saab’s adorned its models’ necks with lush fake flower necklaces. At Prada, white fabric flowers decorate skirts and shoes.
So it’s not surprising that the hashtag #flowerheels already has over 5.7 million views on TikTok. Many of the videos feature people giving their sandals a floral upgrade. Some involve sewing, others glueing artificial flowers onto their shoes. However, if you want to keep the option of wearing your shoes without any decoration, I don’t recommend either. Instead, try using pin-on flowers. Being the flower fan that I am, I tried it out and will show you how it’s done.
Step 1:
If your artificial flowers have stems, cut them off first. This is probably the easiest part. If there’s still too much of the stem on your blossom, cut it back with scissors.
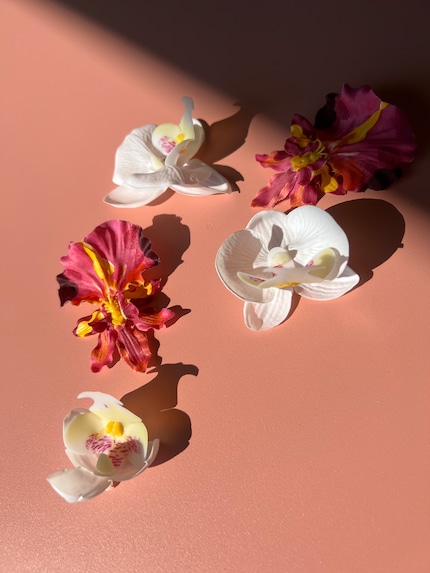
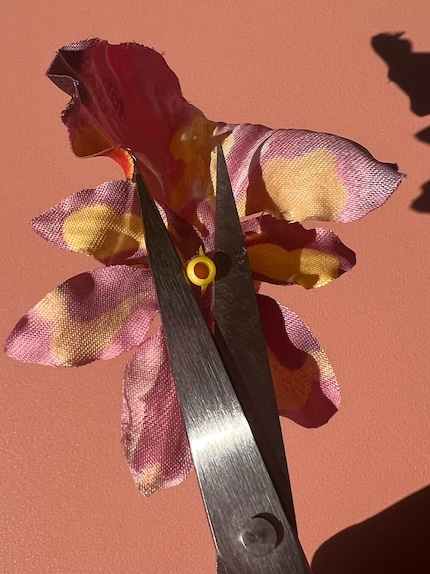
Step 2:
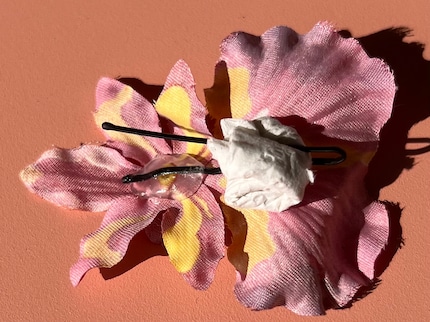
Take the bobby pins and cram a ball of kitchen towel or tissue paper in the back of the pin. This pushes the two sides of the pin apart and prevents them from being glued together in the next step.
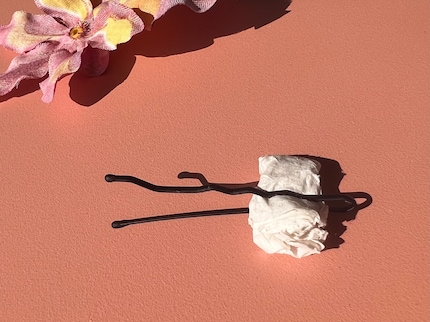
Step 3:
Using your hot glue gun, put a generous dollop on the remaining stem of the flower and press the top of the hairpin onto it. Think about how you want to align your flower beforehand and make sure the pin is well covered by the flower. Once the glue has cooled down a bit, you can flatten the gluey area with your fingers.
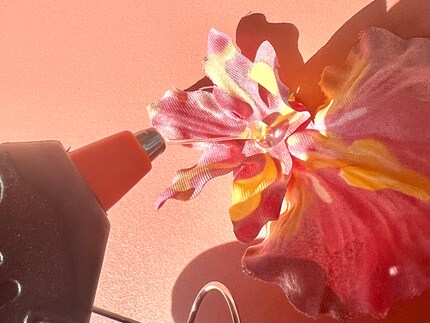
Step 4:
Allow the first layer to dry a bit before adding a second layer of glue. Press your finger on it again as soon as the glue’s cooled down somewhat. You can remove the piece of paper from the pin after soon after. If the bobby pin’s become a bit wide because of the paper, squeeze it tight again at the back using pliers. Your flowers are good to go as soon as the glue’s fully dried.
Step 5:
Anything goes when it comes to placing the flowers. You could pin them on in the middle, on the edge, in the toe are or up around the ankles. Asymmetrical arrangements are also very pretty. For example, clip on two flowers on one side and only one on the other.
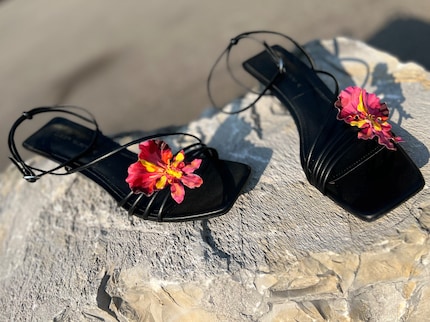
What’s great to know is that the bobby pin isn’t uncomfortable. You’ll hardly feel it at all. If you’ve fixed them to your shoes properly, they shouldn’t slip around much, either. I’ve even had to run in my flower sandals and the floral decoration stayed nicely put.
Has endless love for shoulder pads, Stratocasters and sashimi, but a limited tolerance for bad impressions of her Eastern Swiss dialect.
Practical solutions for everyday problems with technology, household hacks and much more.
Show all