The toy team tests the new modelling sets from Revell
The Galaxus toy team is enthusiastic about Revell's new idea: modelling from small to large. The models from level 1 are suitable for children from the age of 4. The level of difficulty then increases continuously up to Level 5, which is intended for experienced and adult modellers. But how difficult are the levels really and what characterises the individual levels? We sat down and built.
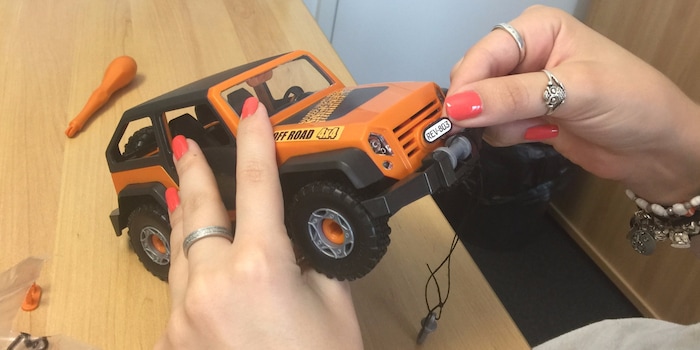
Level 1: The off-road vehicle
Vanessa tested and assembled the Off-Road Vehicle from Revell; she works in Product Management for the Baby team. For her, modelling is a foreign concept and the last time she tinkered was in kindergarten. "Assembling a car like this for 4-year-olds is child's play," Vanessa said and got started - without consulting the instructions. After just a few minutes, however, she realised that this couldn't be the right way. But with the instructions, it went quickly. She only had to put the individual parts together and connect them with screws. The screwdriver is included in the Level 1 kits and the small parts are available in abundance. If one is lost or broken, a replacement is provided. Finally, all you need is a little patience to stick the stickers on nicely and the car is finished.
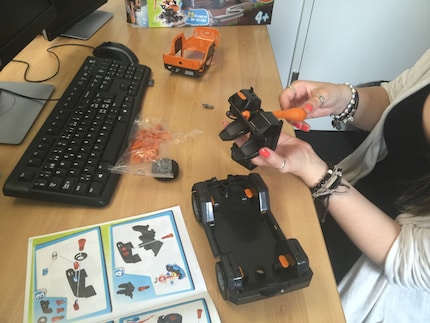
Vanessa thinks a 4-year-old child might still need help putting this model together from time to time. From around 5 to 6 years old, however, it should be possible to do it alone. The incentive to put the car together is certainly great for children, as it drives, has a removable roof and a winch. Unfortunately, the doors cannot be opened and as an adult you will need a steady hand to crank the cable winch back up nicely. All in all, the kit is a really easy introduction to the fascinating hobby of modelling.

Level 2: The Boeing 747 from Lufthansa
I, Irene from Marketing, had to assemble this "Easykit" aeroplane from Lufthansa. I don't have a deep connection to the topic of modelling either, but I found the promises "This makes modelling super easy" and "The plug-in mechanism makes it quick and easy" extremely encouraging and set to work. I assembled the model in 45 minutes, often questioning the instructions and at some point doubting myself. No, the instructions were definitely wrong! I should have realised as soon as I unpacked it that it wasn't going to be that easy. At level 1, the instructions are still playful and colourful. In level 2, you are already working with classic instructions in black and white. In contrast to level 1, there are no more spare parts in this pack. The pressure increases. If one of the millimetre-sized parts is gone, it is lost forever. My personal insider tip for all beginners: Don't remove all the parts from the grid first, otherwise you won't have a chance of finding the right parts afterwards. Fortunately, I realised this in time and (mostly) followed the instructions correctly.
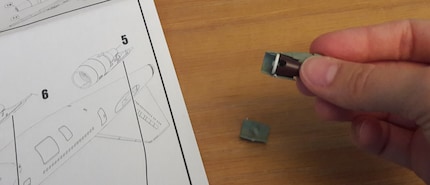
The instructions are not quite as self-explanatory as with LEGO, so you have to think for yourself! In addition, you often have to press the parts firmly together so that my hands hurt after three quarters of an hour of modelling. At the same time, some of the parts are extremely small. Children's hands would probably be calmer and able to work more delicately, so they would certainly master the task better. The kits from Level 2 are also suitable for children aged 8 and over and are already pre-painted.
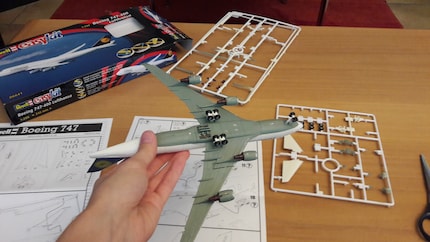
In the end, I had to choose between two options: Either I attach the wheels or I cover the openings as if the wheels were inside and the aeroplane was in the air. I bravely decided in favour of the former and carried out these steps. I think it's a shame that the wheels don't roll like the model from level 1. The play value is already lower here. It's much more about the modelling as such. This kit is a good way for children to get to know the hobby of modelling. Those who are fascinated by it will soon want to continue with level 3.
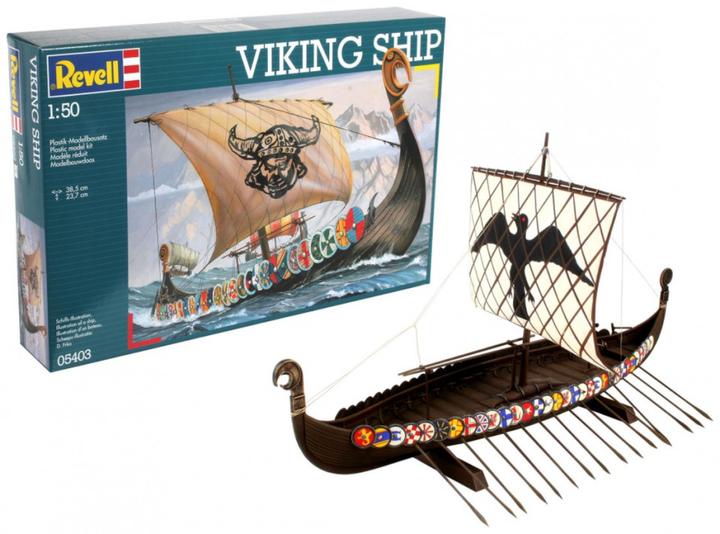
Level 3: The Viking Ship
Now it gets challenging: while levels 1 and 2 only require the parts to be put together and stickers to be stuck on, level 3 requires gluing and painting. Karin works in Product Management for the toy team and she doesn't have much experience in modelling either, but she dares to tackle Level 3 for us. It takes a long time to build a model like this and you need a lot of patience. This starts with the fact that the instructions are more of a suggestion. Details can be worked out in more detail or not. The instructions often show options for painting or gluing. This way, the experienced person can decide for themselves how they would prefer to do it. The layman, on the other hand, and even children would be rather overwhelmed from Karin's point of view. Revell suggests the Level 3 kits for children aged 10 and over.
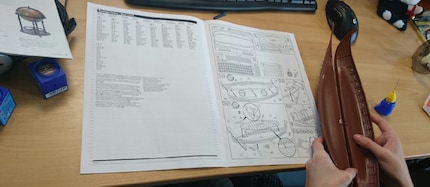
In contrast to level 1, there are no more spare parts in this set. If you don't attach a sticker correctly or don't paint an element nicely, you won't get a second chance and you'll regret your mistakes. Karin found this out for herself. A sticker has to be affixed to every single sign on the edge of the ship. But these are not simple peel-off stickers, because the glue has to unfold first. The instructions are not quite as detailed in this step and, as I said, there is no sticker to try out. It has to work right away.
So here's a tip for anyone who buys the model and will soon be at the same point: The adhesives hold very poorly directly on the plastic. It is therefore worth painting the signs first. The stickers adhere better to the paint. Karin recommends the following procedure:
- Soak the stickers in water to dissolve the glue
- Remove the paper
- Carefully slide the sticker onto the label.
- Carefully dab off the sticker.
Afterwards, the stickers can no longer be moved. You should therefore work as precisely as possible, otherwise it won't look very nice in the end. But Karin got better and better with practice. It's good that there were over 40 signs in total. This example shows that if you are patient, have a love of detail and a steady hand, you will really enjoy the model.
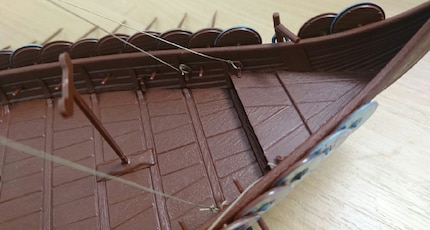
Karin was fascinated by the fact that the sail and the mast are constructed using a rope construction and only hold if this is done correctly. Unfortunately, a lot of things had to be glued. It would be different with the wooden models from Da Vinci. With these, the components support each other so that no further fixing is necessary. However, these models are not easy to build either.
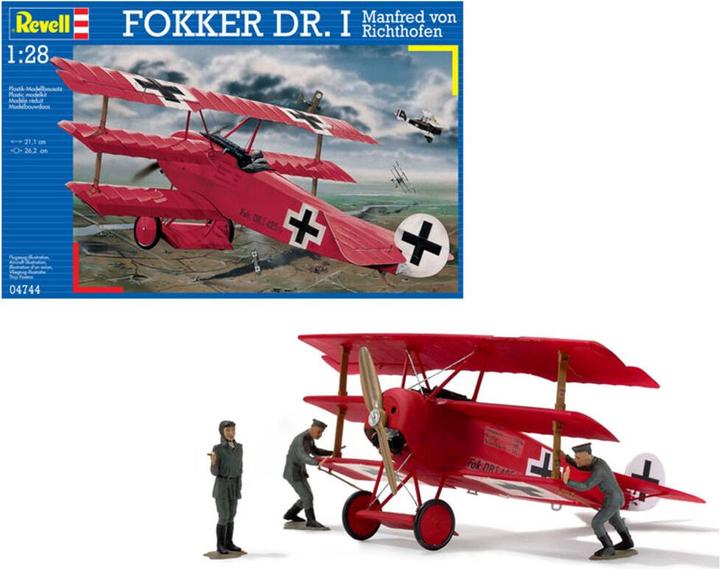
Level 4: The Fokker DR.I Richthofen
We asked Christian, the professional LEGO builder and Product Manager in the toy team, to build the level 4 set. The last time he assembled a Revell model was 20 years ago. Christian started by removing all the individual parts from the grid and colouring them in. If you're thinking of my tip for level 2: Christian put the parts together by appearance, not by number - that's obviously also a possibility. Unfortunately, he didn't have enough stamina to paint all the pieces. You can see the difference between the painted wings, which are matt, and the shiny fuselage, which was not painted. Unfortunately, he should have added stickers to the fuselage at the end. However, these only stick to the painted surface. Painting parts afterwards or correcting other mistakes is generally difficult in modelling. With a little more experience, however, this problem is minimised. Revell also recommends the Level 4 models for advanced modellers who already have some experience. If you work cleanly and don't skip any steps, the model would be extremely detailed.
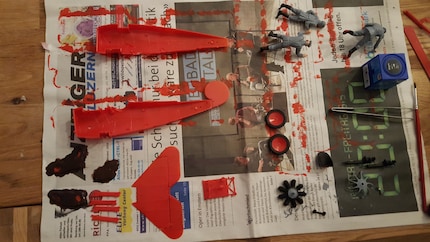
In general, Christian had great fun assembling the model. Step by step, he built a beautiful model from individual parts, which was already impressive while he was working on it. Compared to the model from level 3, Christian had very few repetitive tasks when assembling level 4. There were always new work steps. For example, each wing had to be attached differently.
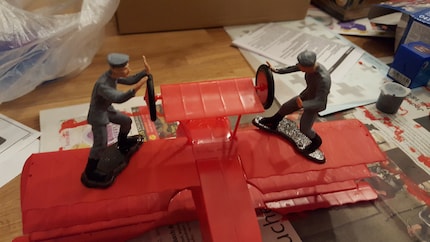
Despite omitting some details and selective painting, Christian was busy assembling for about 9 hours. In the meantime, the colours or the glue had to dry again and again. The picture above shows a creative approach to holding individual parts together.
Level 5: The VW Type 2 T1 Samba Bus
The kits from Level 5 are designed to challenge modelling experts. This requires experience and skill. Oli, the Product Manager of the Model Making and Hobby division, said: "Challenge accepted!" and set to work on his masterpiece. In between, he almost threw the pretty VW bus out of the window. But he kept his promise, painted the bus with a lot of diligence and patience and presented the finished Bully after 30 intensive hours of gluing and painting. He could have worked on it more precisely and with more love. But then it would certainly have taken him much longer. For example, Oli didn't paint the parts that you can't see from below. The set consists of tiny parts that you have to hold with tweezers and glue together. This requires a very steady hand and a little talent for such work can't hurt. Here in the picture you can see an example of the many individual parts of the motor, which Oli had to glue on separately.
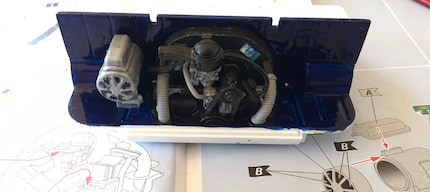
In order to let everything dry and avoid the risk of the individual parts falling apart again, he fixed the whole thing with adhesive tape. Of course, tips and tricks like this are not included in the instructions. In general, you should have a good imagination and modelling experience to understand the building instructions.
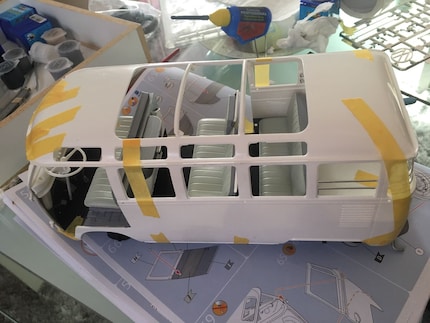
Painting was also a test of patience for Oli. It is particularly difficult to paint a large area smoothly with a brush and paint. You can always see strokes through the brush and inaccuracies quickly arise. Conclusion: A model like this would look much nicer if you painted it with an airbrush gun.
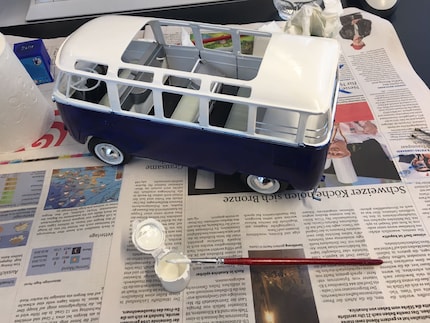
Level 5 delivers what it promises: it's the challenge for experts.
For the sets from level 3 you need suitable tools, colours and glue. This is not included in the building sets. These tool sets, for example, are suitable for getting started.
For all model building sets from Revell
I love the strategy game “The Settlers of Catan”, the Ravensburger puzzle “Colourful Cupcakes” and the pink fluffy unicorn that sits on my desk (a birthday present from my workmates). Not only do I have a weakness for toys, I also get excited about good food and comedy TV shows.
