
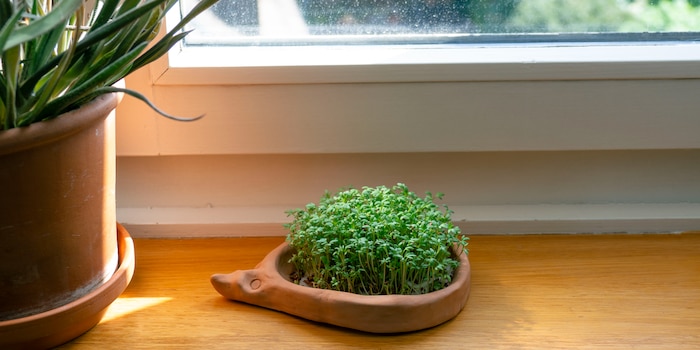
Just hold the cress: How to pot your own cress hedgehog
Do you love cress as much as I do? Then now is the time to make your own growing tray and grow cress in it. I'll show you how to do it with air-drying clay and why you probably won't be spared a trip to the kiln anyway.
With their hot and spicy flavour, they give every salad a fresh kick. The sprouts also contain a large number of vitamins and minerals. And the best thing about this delicate little plant: It grows like a weed.
This is probably the reason why most children pot a cress hedgehog at least once during their school career to grow the sprouts in. Of course, I also made one at primary school. In my memory, the cress grew so quickly that I could watch it grow. Now, a few years later, I'm trying my hand at pottery again. But with clay that doesn't have to be fired, but dries in the air. Nothing ventured, nothing gained.
The clay makes the pottery
The real reason for my courage to air dry the cress urchin: I don't know anyone with a kiln. What's more, the clay is supposed to be hard after just twelve hours and doesn't need to be fired at all. Just with air and love.

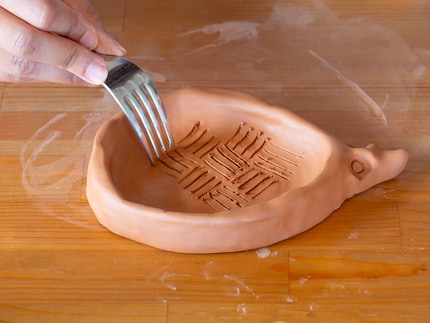
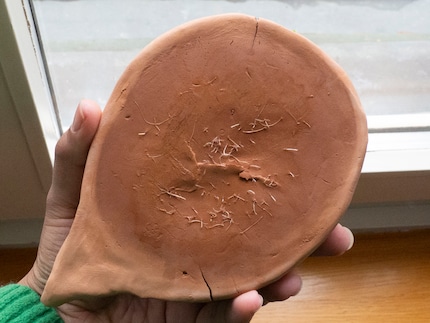
To make the body of the hedgehog, I first model a drop. The front tip should become the nose. Then I add a rim so that the water doesn't run out of the bowl when pouring. I leave a part for the head and press two indentations into the face with my thumbs. I make two eyes there with a pen lid. Finally, I carve a few grooves into the surface with a fork so that the water is better distributed and there is no waterlogging. Voilà, the hedgehog is ready! The cress only has to wait another twelve hours.
Source: Stefanie Lechthaler
The perfect hedgehog does not exist
A few hours later, I look at the hardening hedgehog and discover many small cracks on the surface. A few drops of water on a rag, wiped over the hedgehog once and I had sealed the cracks again. The clay can obviously be softened again afterwards. Could be less favourable for my growing pot. I continue to wait and leave the hedgehog to dry overnight.
The next morning, the hedgehog is completely hardened and looks good - apart from two new cracks. I plaster over the cracks and have to extend my waiting time by another day.
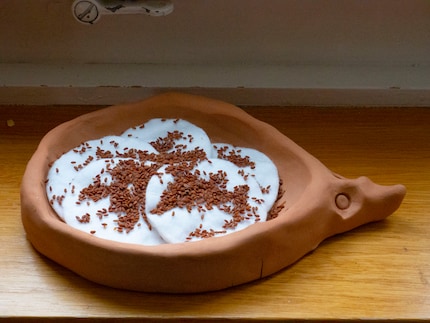
The next day, cracks have already formed again in new places, but the surface of the hedgehog is mostly smooth and ready for growing cress. Good enough. I spread conventional cotton wool in my hedgehog and let the cress seeds soak in water for a few minutes until they have a slimy surface. Then I spread the seeds on the cotton wool and moisten them.
Source: Stefanie Lechthaler
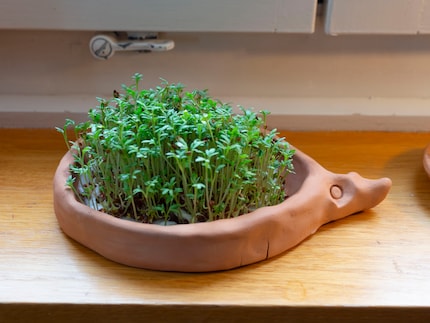
Now I water the seeds twice a day. In the morning and in the evening. The first seedlings appear on the third day. But there are also damp patches on the underside of the seed tray. The water has softened the clay and returned it to its original state. Apart from two drops of water, I can't find anything on the windowsill and because the first cress seedlings are already growing, I leave the cress seeds in the tray and continue with my experiment.
Source: Stefanie Lechthaler
When Kresse wants, everything stands still
On the sixth day, a dense, green forest of cress has already grown over the hedgehog's back. The smell of cress is in the air and it is impossible to imagine life without it. The underside of the hedgehog continues to suffer from the moisture. But that doesn't bother the cress at all. On the contrary, the little plants have allowed their roots to grow through the clay and are thriving.
Source: Stefanie Lechthaler
Even though it worked very well, I'm going to burn the clay of my cress egg at the next opportunity. Because as great as the cress yield is, it probably wouldn't be enough to pay for any moisture damage in the flat. If you don't have the option of firing your clay but still want to grow cress, I recommend using a saucer or a ready-made seed tray. Whatever growing tray you use, make sure that there is no waterlogging and that you change the water daily. Otherwise, you can watch not only the cress but also the mould grow.
Painting the walls just before handing over the flat? Making your own kimchi? Soldering a broken raclette oven? There's nothing you can't do yourself. Well, perhaps sometimes, but I'll definitely give it a try.
Practical solutions for everyday problems with technology, household hacks and much more.
Show all
