Background information
Kettle barbecue tutorial part 1: The kettle barbecue - a real winner
by Daniel Haupt

If there's one thing we all love (vegetarians aside), it's a perfectly cooked steak from the charcoal grill. With a beautiful aromatic crust, perfect branding and a beautiful pink colour on the inside, as well as being wonderfully juicy. But how do I get such a perfect steak? How do I achieve a beautiful branding? And what's the best way to keep an eye on the cooking point?
With the following tips, you too can get a near-perfect steak in your charcoal barbecue
.
You can't get a perfect steak from a sinewy, zero-eight-fifteen piece of meat from the discounter. Who would have thought it... a sensible starting point, i.e. a good piece of meat, makes for a good steak afterwards.
And a good piece of meat only comes from a good and happy cow that has had as much space and pasture as possible for as long as possible in order to build up the appropriate muscles and grain in the meat.
The meat of older cattle also tastes much more intense than if the animal was slaughtered at a young age. Hands off the young bull. The "old cow" or "granny cow" is on the lips of steak lovers everywhere
.
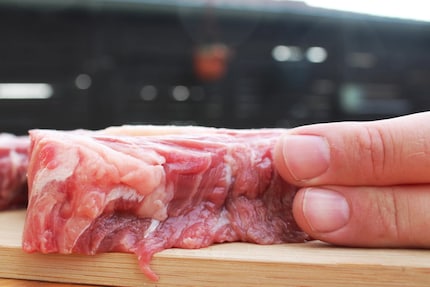
Your steak should be cut at least two fingers wide, anything less will be derided as carpaccio.
The advantage of cutting your steak to a decent width is that it is much more difficult for you to mess up the steak on the grill afterwards.
A thinly sliced steak may already be cooked through on the inside during the longer searing process (after all, we want a crust) and, in the worst case scenario, will be the sole of a shoe in no time at all.
Don't put your steak straight from the fridge onto the grill
.
Put your steak on a plate and leave it to come to room temperature. Allow the steak to relax outside the fridge for half an hour to three quarters of an hour and reach operating temperature.
While your steak is out of the fridge, give it a good sprinkling of salt on both sides. Because contrary to rumours and misgivings, steak can and should be properly salted
.
A steak or meat in general does not dry out just because it is salted. You would have to put it in a lot of salt for a very long time.
In fact, the salt binds and removes a little liquid, but only from the surface of your steak. This ensures the delicious crust later when searing.
However, it is better to avoid peppering. The pepper burns at the high temperatures at which we sear the steak and develops bitter substances.
A steak is always seared over a direct open flame. The optimum temperature here is 250 - 300 degrees. In this temperature range, the so-called Maillard effect ensures the roasted flavours in the meat.
The steak is best cooked at a much lower temperature of around 150°. In the kettle grill, using charcoal baskets is easy: Simply take a charcoal basket out of the grill and you will noticeably lower the heat.
I often make it very easy for myself and place the steak in the indirect area and put the lid on at a slight angle so that additional hot air can escape in the indirect area.
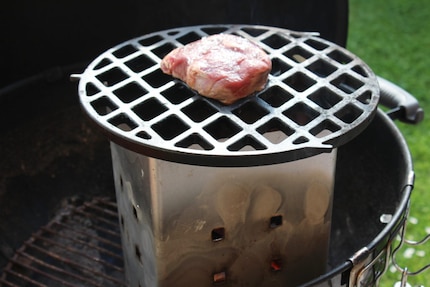
A great tip is also to grill the steak directly on the barbecue fireplace (aka the chimney grill). Take a relatively small amount of coal for the chimney and when it is glowing nicely, place the grill grate on the chimney and grill the steak. Tip: The cast iron insert of the GBS is ideal for this (see photo). After grilling, pour the coals into the kettle grill. Because you have only used a small amount of charcoal, the temperature in the grill will not be too high. Now you can finish cooking the steak.
You can also use a cast iron grid for searing; this retains the heat even better and also ensures your branding without having to turn the steak by 90°.
Otherwise, the motto is: place the steak directly over the embers, turn 90 degrees after 90 seconds. Then turn the steak and do the same. This will give you a nice grill pattern.
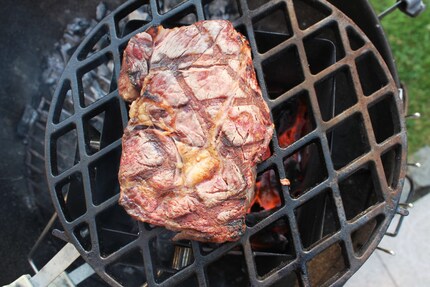
For the perfect steak, you naturally choose the perfect fuel. In this case, it's not briquettes, but a decent charcoal
.
In fact, there is also special steakhouse charcoal - this usually burns nice and hot and also has a good denomination.
In order to cook the steak just the way you like it, you need to determine the cooking point.
Everyone here will have read about the hand-ball technique. To do this, first press your index finger on the steak from above. Then you do the palm test:
Hold your hand loosely and then touch your index finger with your thumb. Now press the ball of your thumb with your other index finger. It is now relatively soft, if your steak feels like this, it is English. With your thumb and middle finger it is medium, with your thumb and ring finger it is done.
Unfortunately, this method is relatively imprecise. For one thing, everyone's hands are different; for example, a craftsman has much more trained hands.
To really determine the perfect cooking point, you can't avoid using a barbecue thermometer:
Cooking degree core temperature
Rare 42°C
Medium 56°C
Well Done 65°C
Please note that the core temperature can still rise by 1-2 degrees during the resting phase (if wrapped in aluminium foil). I will come to the resting phase next
Now comes the most difficult part for you. The steak has reached its cooking point. But don't cut it immediately if you don't want the meat juices to fly around your ears.
Wrap the meat tightly in aluminium foil and leave it to rest for at least five minutes, preferably ten. This allows the meat to relax a little, the juices to disperse and the flavour of the steak to fully develop.
Now you've done it. You can cut and enjoy your perfect steak. I can't wait to see how your perfect steak turned out and hope my tips have been of some help to you.
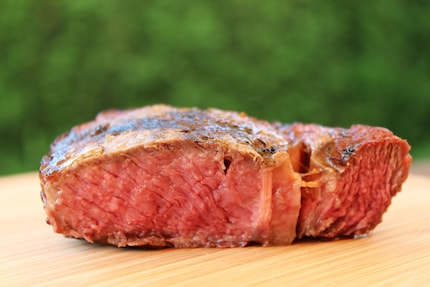
(All images courtesy of www.project-bbq.de).
I was born in the Rhineland, am a project manager in IT and a family man. Away from ones and zeros and at the latest with the move into our home I have found my only true project: The barbecue!
<br /><br />
Since 2015 I have been writing about this on my blog. There I give my readers all sorts of tricks and tricks about barbecuing with charcoal and present my latest creations and ideas.
<br /><br />
You'll find more of me here:
<a href="http://project-bbq.de" target="_blank">project-bbq.de</a>
Interesting facts about products, behind-the-scenes looks at manufacturers and deep-dives on interesting people.
Show all