Guide
DIY fashion for beginners: a trendy Insta shirt today
by Vanessa Kim


In the "DIY for beginners" series, Anne and I show you how to recreate fashion clothes or how to rescue your old clothes. Today, we're showing you how to make your T-shirt bigger for after the holidays.
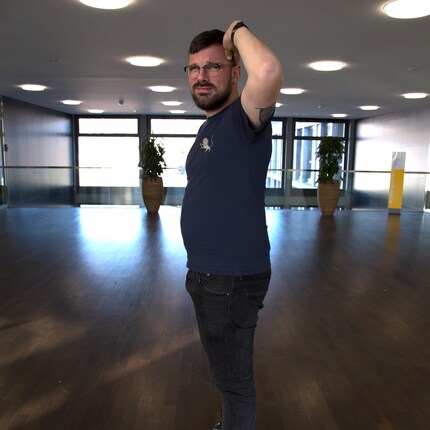
A mulled wine here, a slice of gingerbread there - who can't resist during the festive season is punished by weight gain. To make your favourite T-shirt fit again, there are three solutions: you can lock yourself in the gym, stop eating anything (I wouldn't recommend it) or make your clothes bigger. All according to the motto: what doesn't fit, fits. That's why we're giving our fellow editor Simon Balissat a helping hand. One of his favourite T-shirts has become too small. It's just the right time to make a new DIY.
What you need:


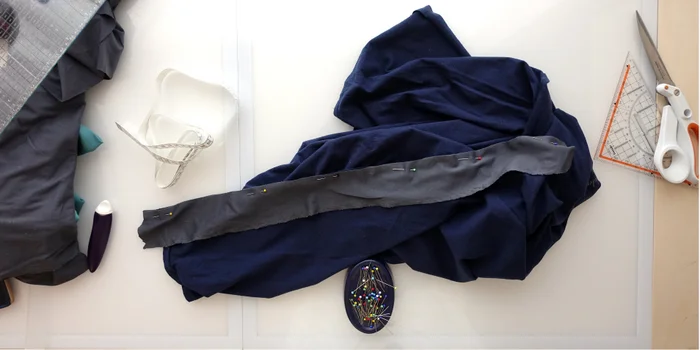
Before we started Anne Chapuis looked for a fabric that matched in terms of colour and material. We finally chose a grey fabric that goes well with navy blue. [[image:18353031]] Indeed, we have a choice.... Anne has a great stash of fabrics.
Next, Anne measures Simon's waist size. She chooses to add 3 centimetres on each side. As the garment is enlarged on the sides we first need to know the length of the side seam and the length of the sleeve. In our case we have: 47 + 11 centimetres. In total, our finished insert should be 58 centimetres long. To the 58 centimetres, we add 2 centimetres to each side. [[image:18342276]] Add 2 centimetres on each side.
The first "problem" doesn't take long: Simon's T-shirt has no side seams. Anne doesn't let this throw her and smoothes the fabric where the seams should be. She then cuts along the fold with a scissor and also cuts along the sleeve seam. If your T-shirt already has a seam, you can also open it up using a seam ripper. [[image:18342390 "If your top doesn't have side seams, you need to pretend it does. To do this, fold your T-shirt in half.",18347050 ".. and cut along the fold."]]
Now it's the insert's turn. For the dimensions of this, Anne took the following measurements: 62 centimetres long (58 + 2 + 2 centimetres) and 7 centimetres wide (3 + 2 + 2 centimetres). To be able to sew the insert to the T-shirt, we use 1 centimetre of the two parts to be sewn together hence the 4 centimetres added. [[image:18344463 "Using chalk or a felt tip pena felt pen draw a line",18343503 "...so you know where to cut the fabric. Our insert needs to be 7 centimetres wide."]]
Fasten the insert to the T-shirt using needles. Make sure the right side of the insert even with the right side of the fabric. To sew, Anne uses a serger and a 4-thread overlock. The latter is ideal for elastic materials such as jersey. [[image:18344576 "Pins hold everything in place while sewing",18344577 "The insert is sewn with an overlock or zigzag stitch."]]
If you don't have a serger, you can also choose a zigzag stitch on your sewing machine. Anne doesn't do things by halves and has a top-of-the-range model. [[image:18344722 "The first seam is finished. Here's the back...",18344724 "and the front.."]]
Place the other end of the insert on the other side of the T-shirt and make sure that the start of the sleeve, the point where the sleeve and side meet and the start of the hem are at the same height. Secure the seam with needles and sew. The first side is finished. [[image:18345812]] A lot can go wrong at this stage: precision is the key word here.
Phew, the first side is done. It's not bad at all. Anne is pleased with the result. [[image:18346062]] The excess fabric that sticks out will be worked on in another step.
Now we start again on the other side. It's important to do the same on both sides so that the T-shirt remains symmetrical.
And there you have it, the T-shirt is in one piece again. The two inserts are sewn. Now it's time for the final step: Sew the hems. There are four in total. Fold the excess fabric inwards. Secure everything with needles. [[image:18345850 " Fold the excess fabric inwards.",18345852 " Secure everything with needles."]]
Anne then secures the "hem" with the sewing machine. [[image:18346152 "The needles hold the fabric while you sew the hem",18346155 "To make the seam match the existing one, we double the seam."]]
To achieve unity at the hem, the seam is doubled. [[image:18346158]] Tadada! The insert is sewn up. We can't wait to show Simon his new T-shirt...
Our experiment was a success. We're happy to return "The Decemberists" T-shirt to Simon in one piece. This was our biggest fear during our test. Let's see what Simon thinks. [[image:18391138 "Suspens: great or bof?",18391146 "Simon is happy with the result."]]
Our colleague is pleasantly surprised: "Thanks, now I can put my T-shirt back on. "We thank him for his confidence and look forward to our next DIY with Anne. So follow my author profile so you don't miss it. Do you have a sewing idea? Let us know in the comments.


When I’m not exploring the depths of the sea as an open water diver, I enjoy plunging into the world of fashion. On the streets of Paris, Milan and New York is where I keep my eyes peeled for the latest trends. And I’ll show you how to take them from the catwalk to your everyday life.
Practical solutions for everyday problems with technology, household hacks and much more.
Show all