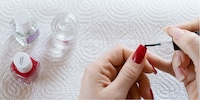

DIY nail designs for you
Tape, toothpicks and more. Here are four beginner-friendly nail designs you can create with common household utensils.
Nail designs don't have to be tricky. Often, just a few touches and simple tools are enough to spice up a boring manicure. Nail blogger Vanessa Bernath showed me her tricks and four beginner-friendly DIY designs you can do at home. Either as a highlight on a single nail or as a whole set.
The basic equipment includes two different coloured nail polishes of your choice as well as a top coat. The stronger the contrast between the nail polish colours, the clearer the design shows. If you only want to set subtle accents, choose similar shades.
Adhesive tape for surfaces
Use tape to create different coloured zones or to show negative space. For this technique, Washi tape is best because it isn’t as sticky as ordinary tape. This is important so you don't tear off the polish underneath when you peel off the tape. If you don't have Washi tape on hand, you can take adhesive tape and stick it to the back of your hand before applying. This lessens the adhesive power and makes it easier to remove from the nail.
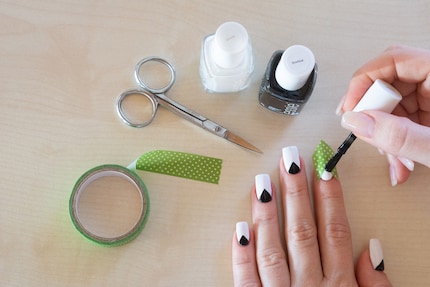
An example for this technique are triangular-shaped accents along the lunula.
To get the look, apply a layer of a bright, heavily pigmented polish. Wait at least 30 minutes before the next step to make sure this base is thoroughly dry. Then cut a small triangle out of a piece of tape and stick the negative shape – not the triangle, but the surrounding area – onto your nail. The tip of the cut-out triangle should point towards the tip of the nail. Make sure you press the edges down firmly so the end result looks clean. Now polish the cut-out with a dark colour and carefully pull off the tape after five seconds of drying time. Work nail by nail, to prevent the dark polish from drying out too much and accidentally removing the painted motif when you take off the tape. Top coating is tricky here. If the drying time is too short, there’s a risk that the top coat will smear your nail art. Therefore, it’s better without.
Nail polishes used: «Blanc» and «Licorice» from essie
Toothpicks for marble effects
Use a toothpick to mimic water marbling. Paint the highlighted nails with the light shade and all other fingers with the dark colour. Work finger by finger, because you have to move fast: again, apply a layer of the light colour to one of your accented nails, but this time a little thicker than before. Immediately put a drop of dark polish on top and draw circles or an 8 with the toothpick. If the result is still not marbled enough for you, you can add more drops. Let it dry for at least 15 minutes before sealing your work with a topcoat. And don't worry if the polish smears a little: this gives the desired effect.
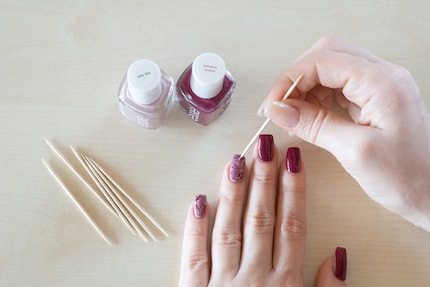
Nail polishes used: «Lady Like» and «Bahama Mama» from essie
Pins for points
Points are achieved with a pinhead. Before you start, prime your nails with the colour of your choice. Then drop the second polish on a piece of foil or similar, press the pin head into it and use it to transfer the polish to your nail like a stamp. The more you press the pinhead on your nail, the bigger the dot will be. Create small, fine dots with a light hand. The logic behind it: light dots go on a dark base coat and dark dots on a light base coat. If you want to play even more with contrast, you can use a dark polish as a base on some fingers and a light one on others. Make sure your dots are dry before sealing with a topcoat. This can take up to two hours. When in doubt, don't do it.
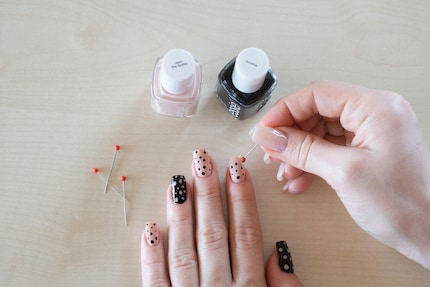
Nail polishes used: «Spin the Bottle» and «Licorice» from essie
Texture from cling film
Cling film brings a bumpy, visual texture to your nail art. Paint your nails with the lighter colour first and let the polish dry well. Then grab a piece of cling film, crumple it up, and brush a particularly wrinkled area with the dark colour. Now dab the painted cling film onto your light nail. After 15 minutes of drying time, seal the pattern.
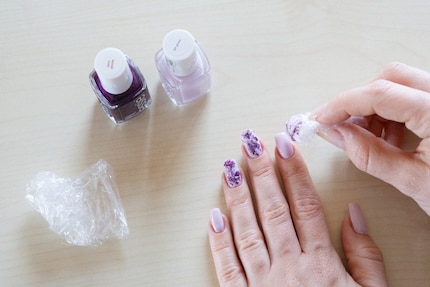
Nail polishes used: «Go Ginza» and «Sexy Divide» from essie
Enjoy!
This is the third part of a series on nail art with Vanessa Bernath. Do you have questions or anything to add? Don’t hesitate to leave a comment. For more inspiration, check out Vanessa’s Instagram account @poesiepixel.
Photo: Vanessa Bernath
As a massive Disney fan, I see the world through rose-tinted glasses. I worship series from the 90s and consider mermaids a religion. When I’m not dancing in glitter rain, I’m either hanging out at pyjama parties or sitting at my make-up table. P.S. I love you, bacon, garlic and onions.
Practical solutions for everyday problems with technology, household hacks and much more.
Show all
