
Background information
A real perennial favourite: the Minion ring
by Daniel Haupt

Most of you have probably already put the barbecue away in the garage for the winter. But it could well be that one or two sunny days are still to come. So what better way to round off the season than with a few tasty ribs?
In my last article, I gave you the Minion Ring, a tool that allows you to maintain a constant temperature in your kettle barbecue for many hours without having to add coals. So it's time to put our newly acquired knowledge into practice. And what could be better than some tasty ribs? To be more precise, we're going to make some 3-2-1 ribs. I'll explain what these numbers are all about in a moment.
Not much in itself. You'll need your kettle barbecue, the Minion ring technique I just mentioned (or a smoker, which replaces the first two points) and a couple of loin ribs. Plus a tasty rub (e.g. Tennessee Teardown from Ankerkraut) or you can mix one yourself (I will of course also give you an example of your own rub in this article).
And that's where the questions start... Loin ribs? I thought we were making spare ribs? Many people get this wrong. Spare ribs are rarely available in shops.
Spare ribs are the entire rib from the back of the pig to the end of the ribs. The short, curved part of the rib that runs from the spine is known as baby back ribs. The remaining part up to the end of the ribs is known as the loin ribs or chop ribs, which you can usually get from your local butcher.
Baby back ribs also work in principle, of course, and just have a little more meat on top depending on how the butcher cuts them.
Before you can work the ribs with the rub, you first need to remove the silver skin from the inside of the ribs. It took me quite a long time the first time I did this, but I learnt quickly. Today, the whole thing is easy for me.
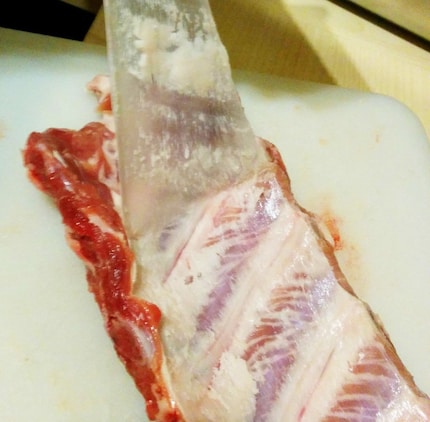
How it works:
If you don't peel off the silver skin, the rub on this side of the rib will not be able to penetrate the upper layers of meat and therefore won't impart its flavour to the meat.
A paprika-based rub is always good for ribs and pork. I can highly recommend the Tennessee Teardown mentioned above or the Cherry Bomb rub from Don Marcos (with a cherry and cinnamon flavour). In my opinion, there are a lot of really good ready-made rubs on the market, because a lot of clever people have already thought long and hard about which mixtures might taste good.
If you still want to mix your own rub, you can use the following mixture, for example:
Place the ingredients in a container that you can close tightly with a lid. Then shake the whole thing well so that it mixes together.
The ribs are then generously "massaged" into the meat with the rub. Next, wrap the ribs tightly in cling film and place in the fridge, ideally for a day. In my opinion, soaking the ribs in apple juice for a few hours before rubbing doesn't add any particular flavour, so I don't usually do this.
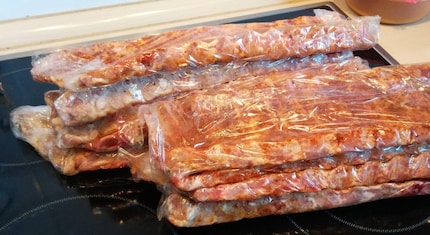
Now back to the numbers game mentioned at the beginning. There are always three phases when preparing ribs:
The names of the ribs depend on how long the ribs remain in each phase. The 3-2-1 ribs that we make here therefore remain naked in the embers for 3 hours for smoking, then go for 2 hours for steaming and finally go back into the grill for another hour glazed with barbecue sauce.
It is also possible to make the ribs in aluminium foil without the steaming phase, in which case they would be 3-0-3 ribs, for example. In my personal experience, the longer the steaming phase, the more tender the ribs become and the less bite they have. These are the ever-popular "fall-off-the-bone" ribs.
Prepare your kettle grill as described in my other article using the Minion ring and set it to a temperature of approx. 110° - 120°. The kettle should not get any hotter than 130°.
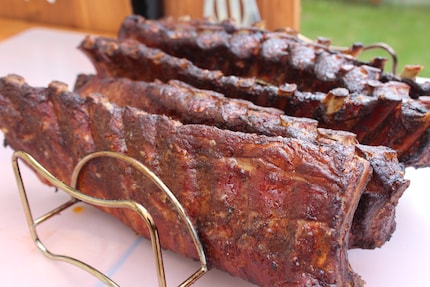
Arrange the ribs on the grid of the kettle grill. A spare rib holder, in which you can place the ribs upright next to each other, is particularly helpful here. Many ambitious barbecuers simply use a plate holder. This can also be stored away to save space and costs very little money. At this stage, the ribs must now rest for three hours. Check the temperature from time to time. As stated above, it should not be too hot or too cold.
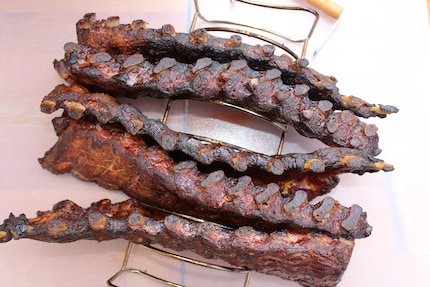
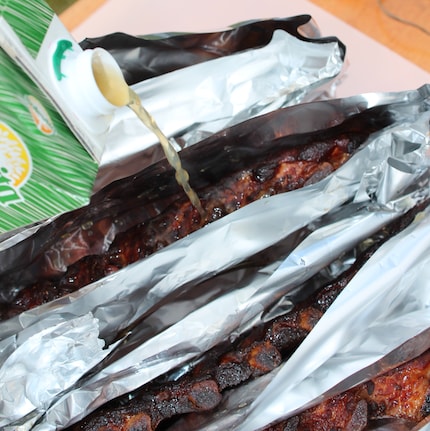
Once you have finished the first phase after three hours, take the ribs out and wrap them in aluminium foil together with some liquid. It is important that the ribs are tightly wrapped during steaming and that no air or liquid can escape. I recommend using tear-resistant aluminium foil here, as aluminium foil that is too thin tends to tear on the bones that are already sticking out after the first stage.
If you want to make it easy for yourself, place the ribs in a Gastronorm container or another suitable aluminium tray. A roasting tin with a draining rack is ideal. Add some liquid such as apple juice or butter and cover the whole thing tightly with aluminium foil. Now return them to the heat, where they will stay for another two hours.
The most time-consuming phase in terms of preparation now follows, as the ribs are freed from the aluminium foil and then individually brushed with barbecue sauce. I usually use a relatively simple barbecue sauce such as Mississippi Original. This is always sufficient for glazing.
As in the first phase, the finished glazed ribs are arranged in the spare ribs holder again and then returned to the grill for their final hour.
Not much left to do now but eat the ribs. My advice to you is to experiment with different lengths for the phases and also try different rubs.
After all, everyone likes their ribs differently, for one person they ideally fall off the bone, while another likes more bite.
Funny anecdote in passing: for Americans (the home country of barbecuing), ribs prepared in this way for over six hours are actually already overcooked. This method originally comes from the preparation of beef ribs, which have a much thicker layer of meat. However, I also love my pork ribs using this classic method. Just give it a try.
I was born in the Rhineland, am a project manager in IT and a family man. Away from ones and zeros and at the latest with the move into our home I have found my only true project: The barbecue!
<br /><br />
Since 2015 I have been writing about this on my blog. There I give my readers all sorts of tricks and tricks about barbecuing with charcoal and present my latest creations and ideas.
<br /><br />
You'll find more of me here:
<a href="http://project-bbq.de" target="_blank">project-bbq.de</a>
Interesting facts about products, behind-the-scenes looks at manufacturers and deep-dives on interesting people.
Show all