
Guide
The sleeper PC project: one ugly duckling
by Kevin Hofer

Super Disks used to be the Mini Discs of IT. They were supposed to replace floppies, but CD burners came first. Today they're unusable, with only their miniscule 120 MB of data space. But you don't have to use them on your PC. With a little ingenuity, you'll be able to make your workplace look better with them.
I built a sleeper PC. That's modern components in an old PC case. I'm raffling it as well. Find out how to win it at the end of this article.
I miss floppy or Super Disks about as much as CDs. Not at all. That's why I'm more than willing to use the 14 discs included in the original Sleeper case in four upcycling projects.
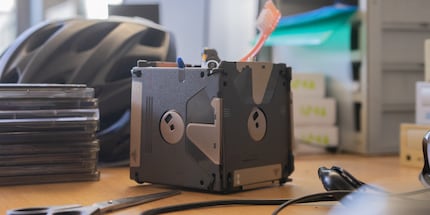
I've got a boringly regular pen holder on my desk. Fortunately, Super Disks can bring some retro to your workspace.
I need five floppy discs, cable ties and some device to make holes in the Super Disks. Our office isn't very well equipped in those regards. Only the Dremel 4000, which I used for milling out the back wall of the Sleeper PC, is at my disposal. Luckily I can drill with it as well.
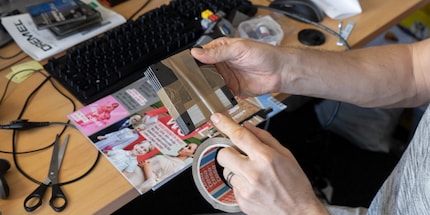
First I glue the five disks together with tape. This makes sure that all the holes I drill are in the same place. To connect the Super Disks I need four holes per diskette, one in each corner. Since Super Disks already have holes at the bottom left and right, I only have to drill two holes at the top. Not that easy when you only have a Dremel. In addition, the drills supplied with Dremels aren't meant for plastic. That's why I keep slipping up, resulting in two asymmetrical holes. If you want to try this, I recommend a cordless drill and a metal drill. Thanks to its tip you slip less and don't crack the plastic.
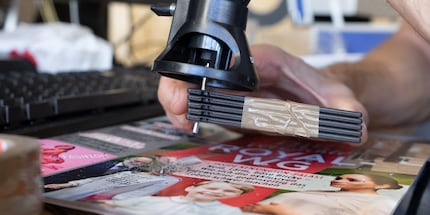
Anyway, I can still connect the disks with cable ties. I lay them out in a cross shape in front of me. The Super Disk in the middle will become the bottom of the pen holder. I connect it to the sides without tightening the cable ties too much. As soon as all sides are attached, I lift them into a vertical position and tighten the cable ties. Now I just have to connect the sides to the drilled holes at the top and my Super-Disk pen holder is ready.
The next project is a little less complex. I need two Super Disks to make a notepad. One for the front and one for the back. I can't use the existing holes here, because they're too close to the edge. If I punch out the paper that close to the edge, it'll tear out. I need to drill two new holes a little further in.
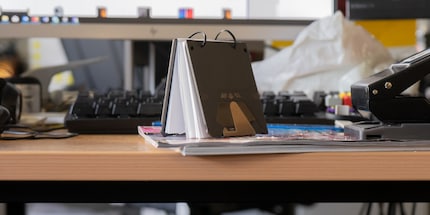
After having drilled the holes, I grab a stack of paper and cut it to Super Disk size with a boxcutter. Then I make two holes with a hole punch at the same location as those on the disks. Now all I have to do is insert two cable ties and my notepad is complete. Instead of cable ties you can also use ring binders, if you feel like spicing up the look of your notepad.

Seven Super Disks down, seven to go. My most ambitious project requires four. Out of the three I have left, I'll make a photo holder. The protective cover of floppy discs is a great place to attach photos. Improve your retro aesthetic even more with pictures from an instant camera.
I drill two holes into the three disks at the top. Again, I stick the data carriers to each other with tape so that they don't slip when drilling the holes. Now I can connect the Super Disks on both sides via the holes at the top and bottom. This time I'm not using cable ties but Paracord, which I still have left over from my failed Cable Sleeving Experiment (article in German). The disk on top has a slightly longer Paracord, allowing me to hang the photo mount by a nail.
The last thing I attempt is a table clock. I don't really need one – my PC and smartphone clocks are sufficient – but a Super Disk clock would look awesome.
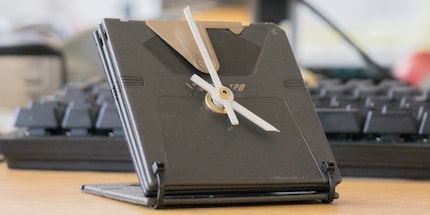
For this project you need Super or Floppy Disks and cable ties as well as some clockwork. As I didn't have much time, I got mine at the hardware store. Of course, you'll also find great models on Galaxus. While looking at the clockwork, I quickly notice that I can no longer work with the Dremel. In order to work it, I have to use a 10 mm drill, and I can't fit those into the Dremel. I need to get a real drill and drill bit.
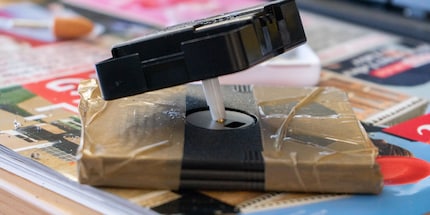
The clockwork's manual tells me that the dial must be between 9 and 13 mm thick. A Super Disk is thinner, so I have to stack three Super disks on top of each other. I then fasten the dial to the bottom of another diskette with two cable ties, which function as a stand.
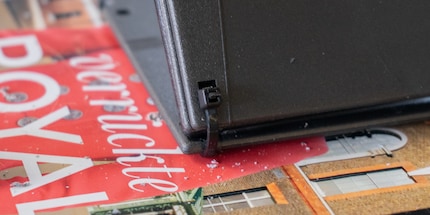
Before I can drill a hole in the middle of the dial to fit the clockwork into, I must first remove the pivot bearing – the round, metal part in the middle. To do this, I first remove the protective cover and carefully detach the back and front sides of the Super Disk from each other. Now I can release the pivot bearing from the magnetic disc inside. Then I put the front and back together again. After that, I glue the disks together again as with the pen holder and drill the hole for the clockwork in the middle.
Since the hands are black, I spray them white. They stand out better from the black dial this way. While they're drying, I connect the clockwork and the dial to the stand. I quickly realise they're too long. That's why I shorten them with scissors. The clock is ready.
Until August 1, 2019, you have time to enter the Sleeper PC competition. You can win like this: At the end of the previous articles I'll ask you a question with three possible answers. You can find the correct answer in the article itself. You get one point for every correct answer. Answer as many of the questions as possible correctly and you will make it into the final draw. The draw will decide who wins the PC.
If you've only just joined us: don't worry, you can still answer the questions on the previous articles. I'll list them for you here:
From big data to big brother, Cyborgs to Sci-Fi. All aspects of technology and society fascinate me.
Practical solutions for everyday problems with technology, household hacks and much more.
Show all