Guide
From pfui to hui: how to re-tile your bathroom
by Carolin Teufelberger

A fireplace is not just a visual eye-catcher, barbecuing over an open fire is simply more fun than with a gas barbecue. That's why I built myself a brick fireplace without further ado.
I have long harboured the desire to upgrade our garden with a stylish brick barbecue. I recently turned this dream into reality. Building your own Chemineé is not particularly complicated, but it does take time. Much more time than I expected. If you want to recreate the project, you should allow at least one day.
The first thing you need to do is decide on a shape and size. I chose a simple version. I used a television programme from SWR as a template. Open design, U-format and an intermediate level that also serves as a shelf. That's all I need. The next step is to organise materials and tools.
Building materials
Approx. 100 bricks
Four floor slabs or cement
40 kg sand and/or gravel
60 kg of fireproof mortar
Four window lintels
Nine stainless steel bolts
Grill grate
Cover for the shelf
Tools
Angle grinder
Drill
Stirring rod
Bucket
Rubber hose or plastic gloves
Trowels
Rubber mallet
Spirit level
A handy brother (optional)
We have most of the products in our range. Hier ist meine ungefähre Einkaufsliste
If, like me, you're more of a silty DIYer, the brother is the most important tool 😉. You can get the bricks from a DIY store, a brickworks or, like me, second-hand. They are all handmade and not exactly the same size, but they are cheap.
I start with the foundation. I want the barbecue to be right next to the seating area. Fortunately, I still have exactly four stone slabs left that fit visually and together measure one square metre. That's enough space. There are some comments on my video template that demand a proper foundation made of steel and concrete. I tend to agree with the response from one user: "They're building a barbecue here, not the Hotel Europa."
To make these look even, you can run a piece of rubber tubing or, like me, a pair of plastic gloves along the joint. As you can see in the pictures, this worked moderately well. If anyone asks: The look is called rustic.
My grout dries so quickly that my Brunder and I could theoretically finish without any interruptions. Fortunately, there are two of us. So one of us can do the brickwork and the other can grout, lay bricks or measure whether everything is straight. A rubber mallet is helpful for moving bricks deeper or in certain directions.
Now comes the intermediate floor. I use window lintels for this. As these are relatively heavy, I take the precaution of leaving the wall to dry for around an hour after eight layers and before installing them. And finally, we also need a sandwich break from time to time.
My window lintels measure 140 x 12.5 x 6.5 centimetres. But they are available in almost every variation. For my barbecue, four pieces are exactly the right depth. This also gives me a shelf measuring 50 x 50 centimetres next to the barbecue. I bricked up the window lintels with the flat side facing downwards to create more surface area. As I want to use a nice board for the shelf, the unsightly surface won't be visible afterwards.
If, like me, you don't place the lintels in the centre of the grill, you have to make sure that their weight doesn't push one side of the grill down. You should also leave a few millimetres of space between the lintels to allow air to pass through. Otherwise the charcoal will burn worse later on.
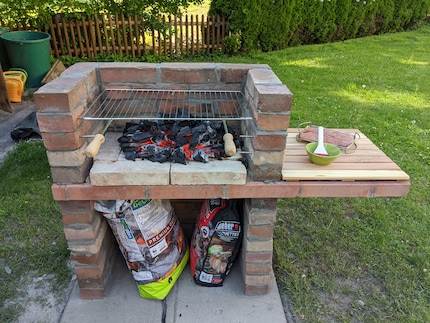
The whole project took the two of us an impressive nine hours with a break. Much longer than I expected, but less than my brother anticipated. After all, we are beginners when it comes to bricklaying. The quick-drying mortar spurred us on. The smell of charcoal and meat always makes barbecuing a pleasure for me. And the feeling of turning the sausages on a self-built fireplace makes the experience even more enjoyable. <p
As a child, I wasn't allowed to have any consoles. It was only with the arrival of the family's 486 PC that the magical world of gaming opened up to me. Today, I'm overcompensating accordingly. Only a lack of time and money prevents me from trying out every game there is and decorating my shelf with rare retro consoles.
Practical solutions for everyday problems with technology, household hacks and much more.
Show all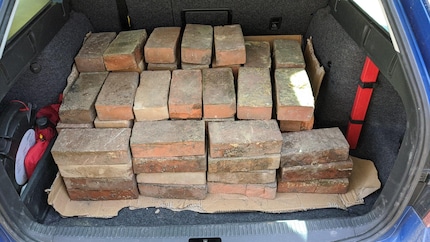
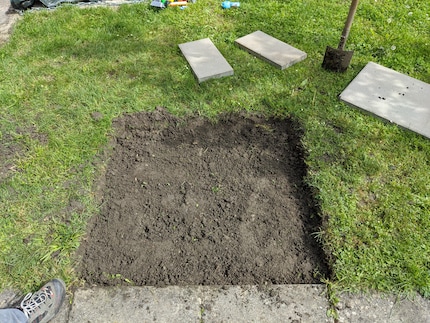
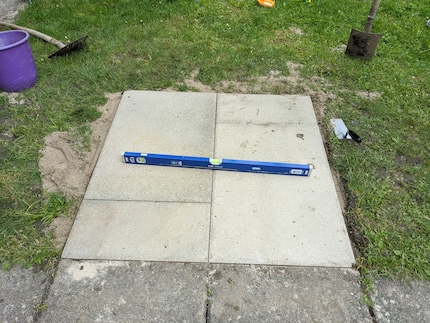
I dig a hole around 15 centimetres deep and fill it first with frost protection gravel and then with sand. The anti-freeze gravel is intended to prevent thermal displacement, which can occur when the seasons change. If I hadn't happened to have a full bucket of it lying around, I would probably have done without it. You have to work very carefully with the foundation, otherwise the whole barbecue will lean. Fortunately, my brother helps me, as he works much more carefully than I do. After around an hour of slow piling, levelling and regular checking with a spirit level, the base frame is in place.
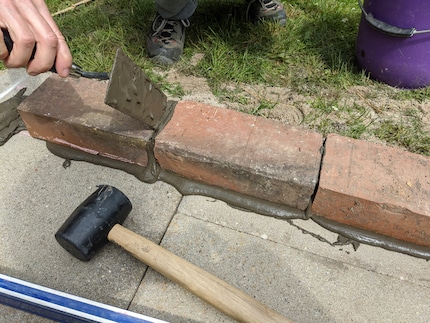
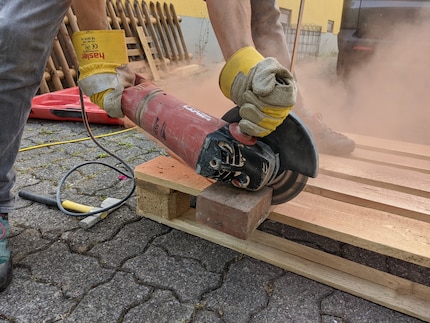
Now the bricklaying begins. As my bricks are different lengths, I lay them out beforehand and choose the most even ones. If necessary, I can play with the joint width a little. My barbecue measures around 88 x 50 centimetres and has a standard U-shape. This means that I need three whole bricks across the width, two on the left (outside the back) and one and a half on the right (inside the back). On the next level, I stagger the bricks so that the wall is stable. I cut the half bricks that I need for each level with an angle grinder that I borrowed from a neighbour. That makes quick work of it.
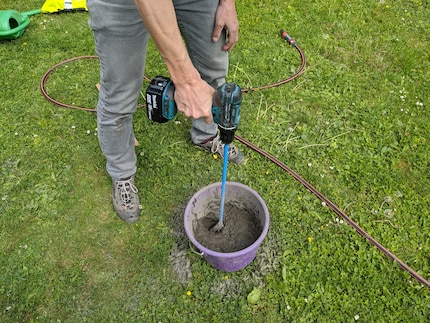
The mortar that holds the bricks together should be fireproof. The packaging will tell you how to mix it and how quickly you need to apply it. A stirring rod is recommended because it does get a bit tiring after a while if you do it by hand. Be careful not to mix too much mortar. As soon as it dries, it is no longer usable. I mixed a third of a 20-kilogram bag at a time. That was enough for two layers of wall. Finding the right amount of mortar to slap onto the bricks is a matter of practice. It seems to me that more is better, as you can simply brush away the excess. On the other hand, if you use too little, you won't get nice joints.
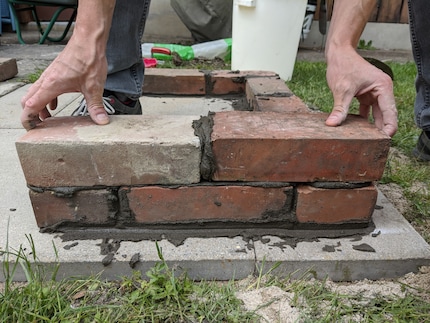
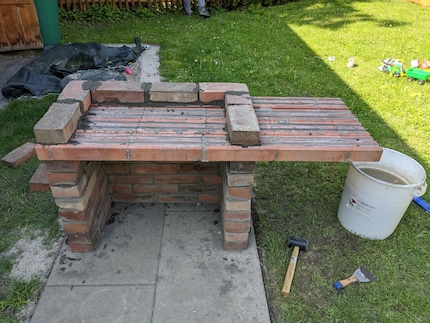
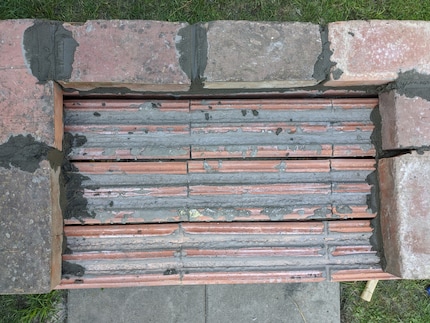
After the window lintel, another five layers of wall follow for my barbecue. This will give me a good height for grilling and hopefully enough wind protection. As I want to place my grill at three different heights, I still have to drill holes in some of the stones. And I need to do this before laying the bricks. Otherwise it will be difficult to replace them if one breaks. I would also have to wait until the wall is completely dry before drilling. I then insert metal pins into the holes. I have the local locksmith cut nine pins from an eight millimetre thick stainless steel tube. Three per stick are enough. That way I don't have to worry about the grate wobbling. As my grate is a bit front-heavy due to the handles, I insert the side pins close to the edge and the third in the centre.
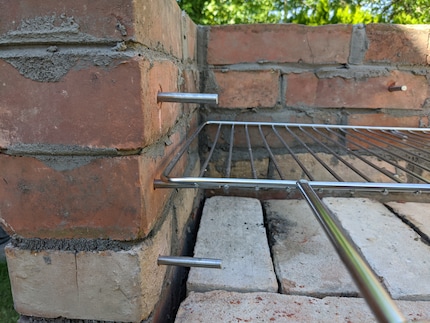
After 13 layers, the barbecue is ready. Now all that remains is to prepare the fire pit. The fire is not lit directly on the window supports. Instead, I first pour a thin layer of sand and lay eight loose firebricks on top, which, to my delight, fit perfectly. Bricks would have done just as well. But firstly, I no longer have enough of them and secondly, my friendly neighbour had a few left over from his old fireplace. These bricks are not bricked up because otherwise they could crack under the heat.

Siemens EQ700 integral TQ717D03