Guide
This wreath is so fluffy you'll want to stroke it
by Stefanie Lechthaler

Are you short of money or do you want to turn an off-the-peg winter coat into a unique piece? With these four simple tricks, you can upgrade it in an instant.
When rearranging my summer and winter wardrobe, I always come across barely worn items of clothing that are far too good to throw away and far too boring to wear. As I have resolved to spend less money on clothes and consume fashion more wisely, I need a solution. One that is easy to implement so that I can bring a breath of fresh air into my wardrobe without too much effort. Current example: a black winter coat that I find yawn-inducing. Here are four simple tricks to change that.
Duration: less than a minute
Additional: one belt
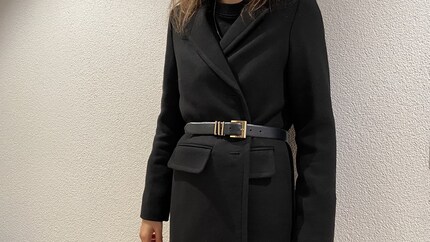
If you fasten a belt around your waist, you can shape even a voluminous coat. You can use it to emphasise the centre of your body if required or depending on the style. The whole look is subtle if you choose a model in the same colour as your coat. A pretty buckle in gold or silver rounds off the outfit. Alternatively, I recommend a belt from the same colour family. For example, if you want to pimp a beige coat, I recommend a brown, cream or camel-coloured belt to create a nice contrast.

Duration: less than ten minutes
Additional: old or new decorative buttons
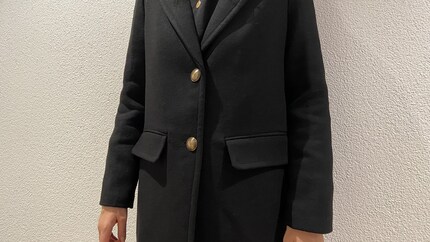
Most of the time, it's the buttons that make an off-the-peg winter coat look inferior. And it shows: they are often made of plastic and have the same colour as the coat or are poorly sewn on. All the more reason to replace them as soon as possible. Your coat will look much better with pretty buttons. If you don't already have some in your sewing box - I keep all my pretty spare buttons - you can find them in specialist shops or second-hand shops. If you're lucky, you'll find cool vintage pieces or ones made from horn. To attach the buttons, I first remove the old plastic models, mark the places where they were attached with a pin and attach my golden pieces with a needle and thread. Before sewing them on, make sure that the new buttons are roughly the same size as the old ones. This way, you can be sure that they will fit into the buttonhole.

Duration: less than five minutes
Additional: one or more iron-on image(s)
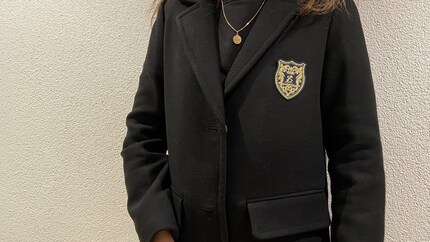
Your winter coat will also be unique with iron-on patches. And yes, I'm also reminded of my childhood. However, there are now also motifs such as letters (for example your initials), coats of arms or eyes that are also suitable for adults. Think about where you want to place the patch beforehand. I recommend the chest area or the upper arm. This is where the motifs really come into their own. I decide in favour of a coat of arms, which I place at chest height. Now I place the coat and crest on the ironing board, heat up the iron and press it onto the patch for around 30 seconds (follow the instructions) as soon as it is hot enough. To prevent it from slipping when ironing on, I keep pressing. I then turn the coat inside out and iron the inside as well. This way, I can be sure that the fabric glue has melted and the patch will stay firmly in place.

Duration: less than a minute
Additional: a brooch
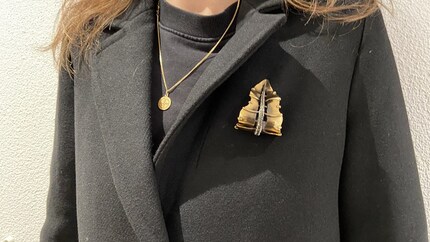
Is ironing on a patch too risky and final for you? Then I recommend a brooch instead. Thanks to the pin on the back of the piece of jewellery, you can remove it just as quickly as you attached it. This allows you to play with different motifs every day. To ensure that the pin doesn't blend in visually, we recommend a medium to large model that you place at chest height. If you don't have a brooch to hand, ask your grandma for one. She's bound to have a pin or two in her jewellery box.

The variant with the belt is my personal favourite. What do you think? Tell me in the comment column.
When I’m not exploring the depths of the sea as an open water diver, I enjoy plunging into the world of fashion. On the streets of Paris, Milan and New York is where I keep my eyes peeled for the latest trends. And I’ll show you how to take them from the catwalk to your everyday life.
Practical solutions for everyday problems with technology, household hacks and much more.
Show all