
Background information
Plant passion instead of DIY store frustration: what’s different about Feey
by Darina Schweizer

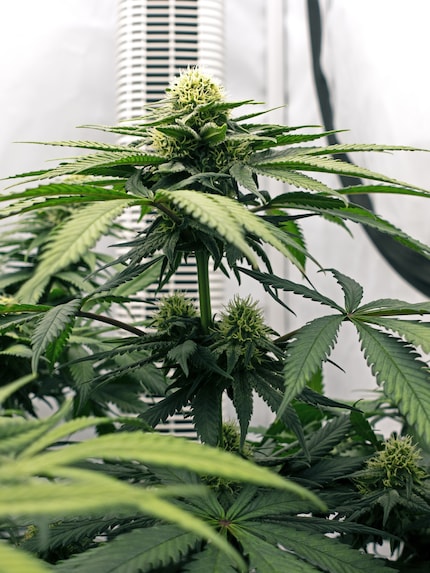
It's starting to smell damn tasty in my new cannabis grow tent. I detect a hint of exotic fruit. Find out how it got this far. How I use my grow equipment in detail to get beautiful flowers.
In this article, you'll learn in a nutshell how I failed at the beginning of the year. And in detail how I am now successfully growing weed. If you also want to find out why I bought a new grow box and what the individual components cost in detail, take a look at this article:
You can find out why I bought the LED plant lamp Lumatek Zeus 600W Pro 2.9 and why I think it's so great here:
As already mentioned, my first grow attempt at the beginning of the year was a failure. I am to blame for this - twice over.
Fail number 2: I switched to stronger light too early during the vegetation phase. I switched back to weaker light when the first leaves started to turn yellow and brown due to the "sunburn".
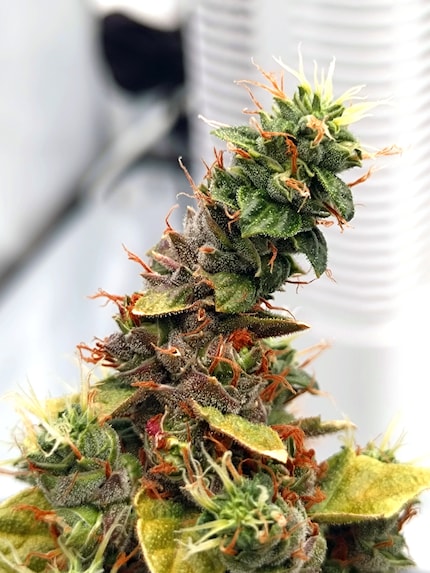
Unfortunately, I didn't take any close-up photos of the plants. I was only able to find one snapshot of a head flower while searching through my photos:
Both failures led to growth stops that could not be made up for. The plants remained small and squat - there were four bonsais. Nevertheless, I continued to give them light - I didn't have the heart to take their lives and start all over again. In the end, I received a good handful of dried grass from each of the 20 to 30 centimetre tall dwarfs. I would probably have got around 15 times as much had I been successful.
My second attempt in the new tent is set to be a success. Now that the plants are in the middle of flowering, there's not much that can go wrong. However, I make sure that there is enough wind and not too much humidity in the tent. There's nothing worse than discovering that fat buds have gone mouldy inside when harvesting.
Three fans provide wind in the tent. One is a tower fan, which stands in a corner on an upturned pot
They send the air downhill and ensure that the plants also receive a fresh breeze above the tower fan. During the vegetation phase, I linked the fans to the timer on the lamp. Now, during the flowering phase, they are in continuous operation. Although they are one of the quieter models, they are the loudest of the whole setup.
By the way, the negative pressure is also visible - the tent wall is pulled inwards by a few centimetres because of it. In the following image, you can see how the lamp is visible on the outer wall of the tent due to the negative pressure.
Too much or too little water is harmful. That's why I make sure when I put soil in the pot that it's neither too tight nor too loose. This allows excess water to seep through and the roots can breathe.
These swarms are a real nuisance. Some midges also like to stick to the flowers, where they die. Picking them out with tweezers is no fun. That's why I suggest sterilising the soil before using it:
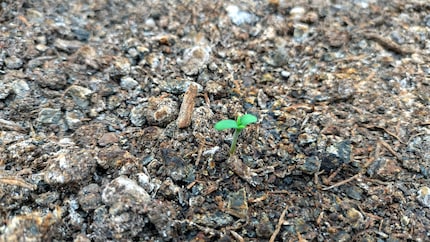
In case you're wondering, where my seeds come from: They're from my freezer. They have been waiting there in airtight packaging to be used. That way they keep for years. And now it only takes two days in moist soil for all four sprouts to see the light of day.
These are approximate values. They refer to regular (feminised) varieties that are grown in a tent with a base area of 120 × 120 centimetres.
The lighting scheme I recommend is based on reports in forums and tables such as the following one from Lumatek. The lamp manufacturer recommends the following photosynthetic photon flux density (PPFD) for different plants depending on their stage of development:
If you grow grass on soil and it is freshly purchased, it usually contains enough nutrients for the first 30 days. In this case, no growth fertiliser is required during the plant's vegetative phase. This is only important if you use soil a second time after a first grow cycle. Or if you keep your vegetation phase correspondingly longer.
I'm experiencing déjà vu right now: my appetite for sweets is back. No wonder, after all, writing needs a lot of energy.
I'm really drawn to the fridge and freezer. A vanilla ice cream sundae with fresh strawberries and a mountain of extra-fat cream would be great right now. Maybe even topped with half a cookie. So I'm wondering whether I should grow berries in future when I'm not using the tent for grass. They are then also less critical in terms of odour development.
However, these also always need fresh supply and exhaust air. So in the last instalment of this mini-series, I'll introduce you to my oversized, powerful tube fan. And the activated charcoal filter that ensures a neutral odour in the house. As a bonus, you can also read about how much electricity my entire setup consumes in detail.
Here you can find part 4:
Cover photo: Martin JudI find my muse in everything. When I don’t, I draw inspiration from daydreaming. After all, if you dream, you don’t sleep through life.
Interesting facts about products, behind-the-scenes looks at manufacturers and deep-dives on interesting people.
Show all
Background information
by Darina Schweizer

Background information
by Darina Schweizer

Background information
by Martin Jud
My four cannabis plants have reached the end of their fifth week of flowering. I watered them the day before yesterday with the
water phosphorus and potassium. This is intended to increase flower formation. Fertilisation is not absolutely necessary to make it to harvest - but it helps. However, I can't afford to make any mistakes with the light. Especially as this is my second attempt with my new cannabis cultivation setup. The first time it went wrong due to human error.
Fail number 1: I have been planting my cannabis seeds in peat growing pots for years. For lazy gardeners like me, this has the advantage that I don't have to repot them. As soon as the young plants are big enough and the first roots penetrate the pot wall, I put them into the final pot together with the seed pot. However, I realised too late that my growing pots this year were a mistake. They were not made of peat, but of cellulose. This meant that the roots could not penetrate the pot wall. I only realised this after a few days and then finally freed them.
It runs continuously on the lowest setting and keeps swivelling back and forth, practically covering the entire tent at its height. Whether it was a good idea to opt for the Hecht 3736 tower fan remains to be seen. I bought it because its tower fits exactly between the LED bars of the lamp. So far, it has done its job well and quietly.
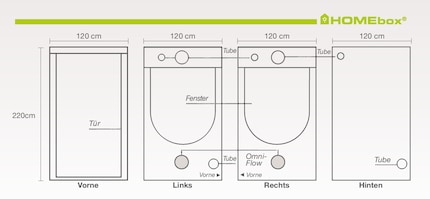
In the old tent, my activated charcoal filter and tube fan were mounted at the top. Although this took up space, it also ensured that the hot air, which is known to rise, was also blown out at the top. In the new tent, I have banished these two elements to the outside - behind the tent. In addition, the air is now sucked in at the bottom. That's why the two circulation fans hang at the top.
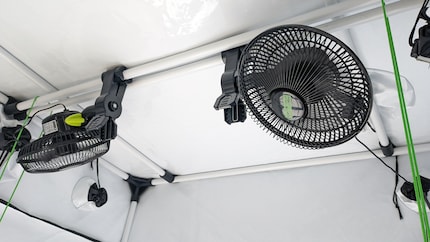
For further even temperature distribution in the tent, I use the negative pressure. The tube fan positioned outside the tent ensures that the air isr that the air is drawn in at the very bottom of the tent through a pre-filter box. Even at the lowest level, it draws in enough air so that there is always a slight negative pressure when the tent is closed. I can use this in turn: There are several tube openings at the top of the tent, which are intended for ventilation hoses. If I leave two of them open, the fresh air is automatically drawn into the tent primarily from there.
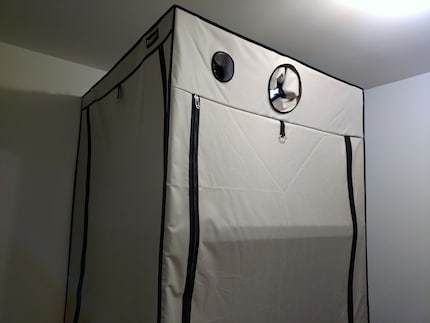
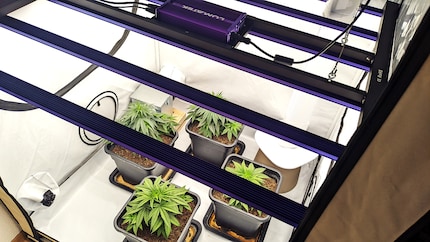
This is one advantage of the large Zeus - its dimensions counteract the contraction of the tent wall somewhat. This is particularly good during the flowering phase, as the "oversized" tube fan then no longer runs at the lowest speed, but at the second-lowest speed (this is the case in the picture above). I used a transformer to give it five speeds. The lamp itself hangs on two small cables so that I can adjust its height quickly and easily.
The medium I use for my grows is citrus plant soil from Ricoter with a pH value of around 6.5. After watering, I allow my generous 18-litre pots to become relatively dry before watering again. Several days pass at the beginning of the vegetative phase. At the beginning of the flowering phase, this becomes a daily ritual for some varieties, which levels off again from the middle of the flowering period. In addition to the fact that I have had good experience with the restrained watering, drying the soil also helps in the fight against fungus gnats - they like it moist. However, these have been present in abundance for several years in any soil I buy, no matter where I buy it from.
When I start the second grow cycle in the new tent, I don't grow in peat pots. However, I still don't feel like repotting. Not only is it a job I don't like, it's also stressful for the plants. So I leave it alone and put a layer of potting compost on top of the citrus plant soil in the pot. And then I stick the four seeds into the soil in the traditional way and trust that they will germinate. Other gardeners let them germinate in a handkerchief between two plates. There are many different ways in which growers do this.
As my fail at the beginning of the year shows, it is important that you neither give too much light nor get too close to the tips of the plants with the lamp. So that you, unlike me, can succeed in growing with the Zeus right from the start, I have created a lighting scheme. It applies to cannabis (and cucumbers, which require the same amount of light) and shows the information required for each stage of development. So lighting time, dimming level and distance between lamp and plant tips. Make sure that seedlings receive light from the very first hour
Autoflowering varieties can be handled in a similar way, but can be kept under 18 hours of continuous light per day - from seedling to harvest. They flower automatically regardless of the hours of light and have a faster life cycle. Some of their genetics come from varieties from the far north (Cannabis Ruderalis), where plants can flower regardless of the hours of sunlight. With regular varieties, however, it is essential to switch from 18 hours to 12 hours of light in order to initiate the flowering phase. Incidentally, indica strains tend to tolerate slightly more light than sativa strains, as they grow closer to the equator in the wild.

But I also recommend using fertiliser sparingly. There are some suppliers that offer specific fertilisers for cannabis. In other words, entire fertiliser lines, some of which also contain products that are not absolutely necessary. Personally, I rely on fertilisers from Canna. Canna, like other manufacturers, offers a dosing scheme that can help you find the right products and fertiliser quantities. You can find it here. To use it, you must first select a product range (Terra) and enter further details such as the size of the nutrient solution container and water hardness. If you select the option "Hard water" under "Water type" and the option "Light fertilisation" under "Scheduling", a fertilisation scheme is displayed that comes close to my own fertilisation behaviour. It's also worth mentioning that you should stop applying flower fertiliser two to three weeks before harvest.
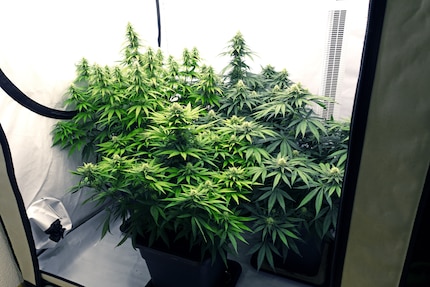
So, now you know some basics. But if you want to grow these magical-looking plants, you'll soon have more questions. At best, it is important to know that it becomes precarious for cannabis in a tent above 30 degrees Celsius. Or you may want to find out how other growers go about growing. How they harvest and mature weed like good wine in jars. So I suggest you get help from the internet community. There are some great forums with very experienced growers. Duckduckgoogle, for example, for "Grower Forum".

Ariel Universal+
72 Washing cycles, Washing powder