

Lantern, lantern! How to make your own little Mr Lion
More and more often you see them standing outside doors or hanging in the living room and soon there will be all the festivals of light that cry out for a homemade lantern. The perfect opportunity to get creative with your child.
"But we're late for dinner! The sun has already gone to sleep!" my little one said to me a few days ago. I replied: "That's right, the sun is very tired right now. But if we make a lantern together, it can always be with us." In response, I came up with a simple craft idea where children of all ages can make their own lantern. The basic construction is a paper plate, as this leaves plenty of scope for individual ideas. Using a lion as an example, I'll explain how you can recreate this lantern with your own children.
Basic materials for the wild lantern
The most important things for the lantern are the paper plates and tissue paper. You will also need a piece of wood and wire to hang the lantern. To decorate it, preferably use black craft paper, acrylic paints, a brand and raffia. A battery-powered string of lights looks beautiful with this lantern.


Folia Tissue paper colored
20 g/m², 1 x

The five steps to success
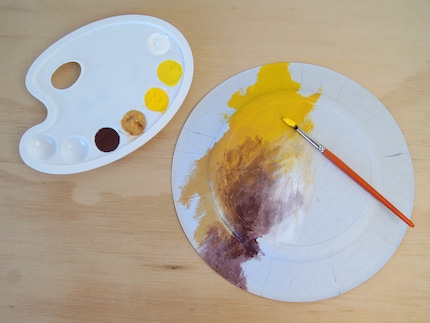
- Choose some beautiful colours and use them to paint your two paper plates
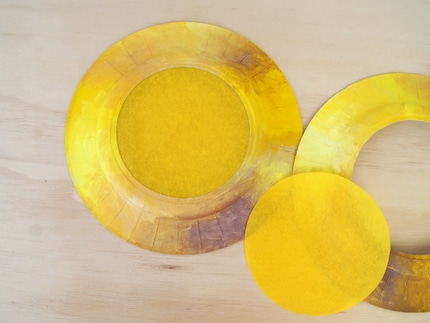
- Cut a hole in both paper plates, preferably with scissors. Glue a slightly larger tissue paper circle onto the inside of the hole.
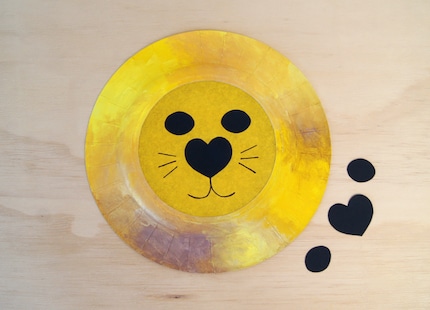
- Cut out the eyes and the nose of the heart from black construction paper. You can also use the brand to carefully draw the mouth and whiskers.
- Punch holes in the outside of the two paper plates. It is an advantage if you glue the lower semicircle together with a thin line of glue. Knot two strips of raffia through the holes of the two cardboard plates lying on top of each other. At the top, tie a piece of raffia to the front and back holes. This creates an opening. Also attach the wire to two holes and wrap it around the wood.
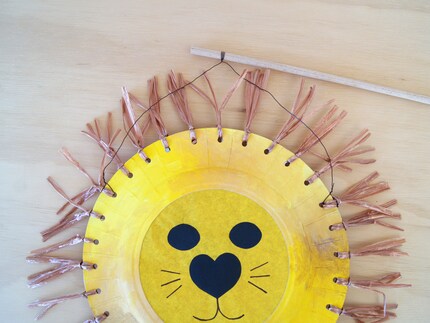
- To make sure the lantern lights up nicely, add the battery-powered fairy lights at the end.
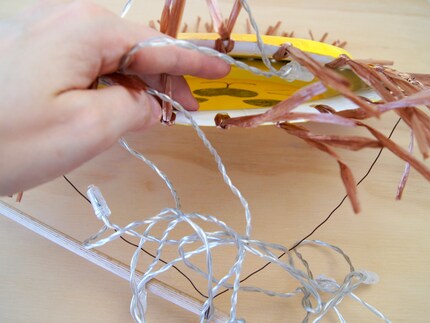
Possibilities with paper plates
Colouring the plates is great fun for the children. You can either paint colourfully or with a specific motif in mind. For younger children in particular, I recommend simply providing a few craft materials that they can stick onto the paper plate and tissue paper (e.g. pompoms, yarn, felt, etc.). The paper plate or the tissue paper can also be cut into different shapes. This creates beautiful effects in the dark.
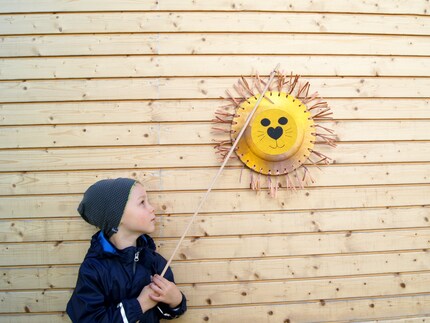
My students and also my own children inspire me every day with their irrepressible imagination. I like to document the creative projects that emerge from this on my blog Fantasiewerk. I hope to inspire many moms and dads to craft with their children. <br> <a href="https://fantasiewerk.ch/" target="_blank">Fantasiewerk.ch</a>
Practical solutions for everyday problems with technology, household hacks and much more.
Show all