3D Printer Battle: Which is the right one for you?
For all the DIY enthusiasts out there, there’s nothing more exciting than getting your first 3D printer. The selection can be overwhelming. But fear not, we are here to help.
Before we begin, I have to get this out of the way: Of all the technologies for 3D printing systems available, we are only going to review Fused Deposition Modeling (FDM) printers. Like everything in life, FDM technology has its disadvantages. Because it works by laying down layers, you can spot those lines. But FDM printers are more widespread, affordable, can work with a wide range of materials and the final product is very sturdy and water-sealed.
We’ve selected three printers to represent different price ranges. There are way more models out there, but if you are not sure what you need, this is a good starting point. I’ll be explaining how it was to work with them from my experience.
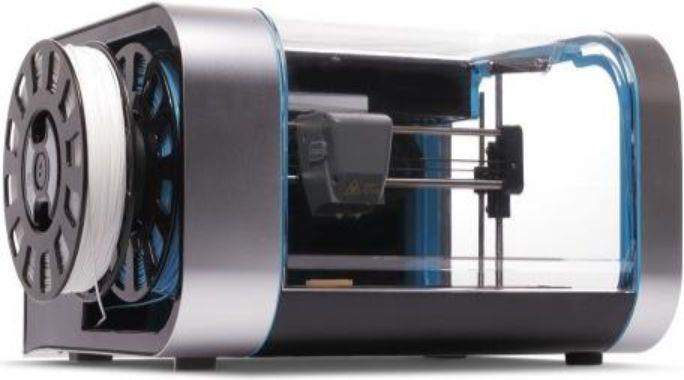
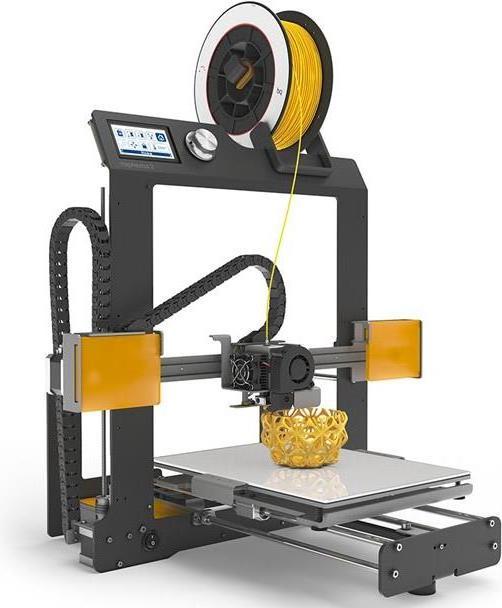
Allow me to introduce you to the reference point of the pricey ones: Ultimaker 3. For the mid range 3D printers we have the RoboxDual. And for the most affordable machines, my very own FLSUN Metal Frame Prusa i3. Are the contestants ready?
Main Criteria
All of these 3D printers come with a heated bed. That’s something you really want to have. It helps with material adhesion and avoid bending of the lowest layers due to cooling. Also avoiding unnecessary headaches in the future, especially when working with other materials other than PLA.
For other important features you might want to consider, I made this chart:
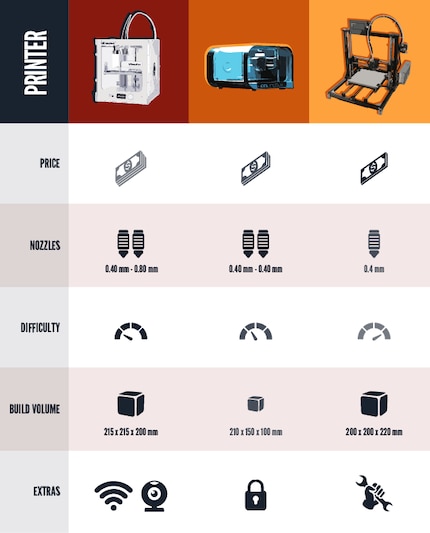
Still not sure? Let’s break it down.
Price
Unless you are sitting on a pile of cash or somehow can justify the big price tag, forget about the Ultimaker 3. Maybe for your business or a school it makes sense, but it’s not precisely something a hobbyist can afford. Is it worth for professional work? Definitely. Should you buy it? Well, keep reading, maybe you don’t really need all that shiny stuff after all.
The Robox Dual is a very nice middle ground. If you already have experience 3D printing and have many plans and ideas to start prototyping right away, yes, the Robox is for you and it won’t hurt your wallet... much.
But if you have no clue what you’ll print, you are fine with the idea of having a 3D printer gathering dust most of the time. Then don’t look any further, grab your screwdriver and get ready to build your own printer. I did.
Extruders
Of all our contestants, only my FLSUN i3 Prusa has one extruder. Did I miss having a second one? Not really. I always found a workaround to avoid adding support material.
But if you are planning on printing complex structures or multi-colored prints, using the second extruder for the support material would be a wise choice.
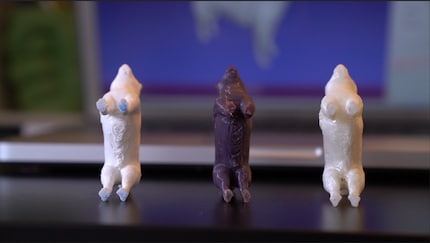
We printed the DigiDog, a model of a dog with the digitec logo on its side, with the lowest settings to compare the quality of the object. The most noticeable difference can be found where the supports meet the actual object. For those, we used PVA filament with the Ultimaker 3. Meanwhile we tried the PolySupport reel that came with the Robox Dual, although it can employ PVA as well.
The type of supports created with PVA by the Ultimaker covers a lot more area around the object. That will give more surface for the actual material to be laid down with a nice finish. This also means double the time spent on printing a big section that will be dissolved later. That's meters of a very expensive material literally gone down the drain.
Robox’s PolySupport filament is brittle and easy to remove, but it left some traces on our final product. That should be preventable with some calibration.
As for my printer, the same PLA filament was used for the supports as for the object. Being the first time we printed something that required pillars, we used the stock settings. The results leave much to be desired. Some tweaking could improve it. We just avoid doing it altogether.
Learning curve
Using the Ultimaker 3 was such a breeze right from the start. Its software has a beautiful user interface and it’s very intuitive. It requires constant calibration but the quality of the products is worth it.
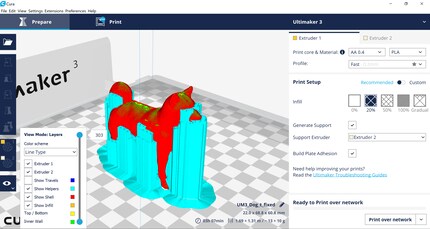
Cura for Ultimaker 3
If you are using Ultimaker filaments, you don’t even have to choose the material from the list. The NFC scanner identifies the type of plastic you are using and chooses the right settings automatically.
RoboxDual did a magnificent job right out of the box, no calibration needed and it was great. Until it wasn’t. At some point it started delivering irregular amounts of filament from one of the nozzles. I’d like to think that it was more bad luck than anything. If that wouldn’t had happened, I would have only praise for this little buddy.
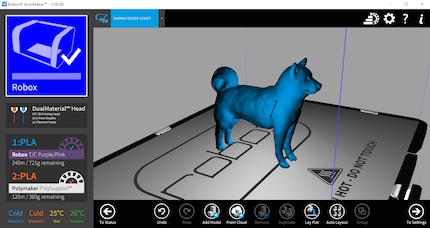
Robox Automaker
Automaker, Robox’s software, is not as polished but you’ll find your way in no time. It also has a system to detect the type of filament you are using, although it only works with Robox reels. The presets are wonderful and it also allows some tweaking for advance users. The only thing I missed was a graphic showing me the current state of the print and a preview of the support structures, both of which Repetier Host does provide.
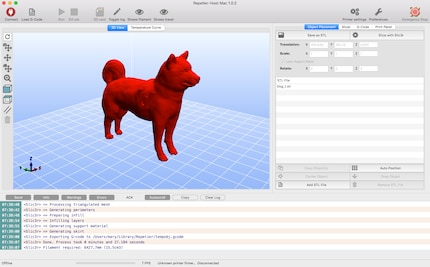
Repetier Host for Prusa i3
While not pretty nor particularly easy to use, if you were able to successfully build your own 3D printer from scratch, you should be able to use Repetier Host. This software is very powerful and flexible and most of all, free and open source. We use it at home for the FLSUN i3 Prusa.
One of my favorite features is the window where you can see the current state of the ongoing print. Don’t expect any fancy presets for each material. You’ll have to google – or learn by heart – the material requirements and add them manually to the print panel. If that is not enough, constant tweaking of the settings will be part of your life until you find the sweet spot for your device.
Because this is a homemade 3D printer, we are talking serious calibration work after assembling it. But once that’s out of the way, the occasional leveling will suffice. A process not too different from the one you have to do with the Ultimaker 3.
Build Volume
This point is pretty straightforward. You need to print bigger elements? Just go for the printer that provides more space to print. Not enough space in the Ultimaker 3? Well, there’s also Ultimaker 3 Extended for 10 cm higher prototypes. Not enough money for any Ultimaker? There are other options offering similar area for a fraction of the price, like the BQ Hephestos 2.
That’s where the Robox falls short. Literally. Still, printing by parts and assembling it later is already a common practice in the field. Consider the little space a big opportunity for creativity. And what it lacks in size, it compensates in stability. I like how the bed doesn’t move at all. That will save you countless hours of calibration.
Extras
Robox’s closed environment is very elegant. Its lockable door is a must in households with little children. That also provides protection from dust and any other contaminants.
In general, the Cel Robox Dual printer is very clean. That also goes for the process. Before printing, the extruders head to a tiny basket in a corner to deposit excess filament there. I wish I could say the same about the Ultimaker, but it tends to get filament leftovers all over the place. Such a shame for a pretty white box.
Another thing I really admired from Robox is the ability to take out the bed for better inspection and easier removal of the final print. It also came with tools for this purpose. The whole kit is very convenient and mess-free.
When it comes to fancy features, the Ultimaker excels with WiFi connectivity and an internal camera. These two things together allow you to keep an eye on your print without having to be in the same room. You can also remotely start your print, pause and resume any time. I would recommend being there in case anything goes wrong. You never know.
But the Ultimaker is not the only one that can have Wi-Fi connectivity. The cool thing about building your own printer is that you can also fix it and upgrade your rig yourself. Just order the part and now you can print wirelessly, or get a touch screen to replace the boring current one.
Printer not stable enough? Print a different part and replace it. A part broke? Print another one. At least a quarter of my prints have been upgrades for my own printer. Nothing better to understand the inner workings of such a complex device than making it yourself. And the sense of accomplishment that comes with building from scratch such an advanced machine on your own is unbeatable.
I take great pride in having built a printer that can produce objects with almost Ultimaker quality levels. But I hear you complaining about the lack of a second nozzle. Well, if I really wanted to have two, I would have ordered an upgrade kit already. And I can still do that. I just don’t really need it for the time being.
Want to future proof your 3D printer? Build your own and you can replace parts as you go.
The choice is yours
As my printer engineer (a.k.a. husband) said during dinner the other day, the Ultimaker 3 is like eating in a fancy restaurant. You know it will be awesome, everything is handed to you and you leave happy but with a gaping hole in your wallet. The Robox would be take away. You can be sure you’ll be happy, but there’s some hit and miss and sometimes your order gets messed up. The self-made Prusa i3 on the other hand is cooking at home; messy, time-consuming and unpredictable. But rewarding and tasty, even if it’s probably not as good as the work of a master chef. In the end, all of them feed you.
I hope this helped you decide which range works better for your needs. Take your time to make the right choice. Maybe now you feel up to the challenge of building your own printer. Or perhaps I just convinced you that this is the worst idea ever. At the end of the day, you’ll be able to make your prototypes, no matter what model you get. The real difference is not made by the printer, but by your creativity, effort and dedication.
Remember: The only limit is your imagination... And amount of filament left on the reel.
I might be a graphic designer, a Pokémon trainer and tech-savvy but I'm no creative writer. I'm on a non-stop quest against bad design. Since 2014, I call Switzerland my home.
Interesting facts about products, behind-the-scenes looks at manufacturers and deep-dives on interesting people.
Show all