Background information
Spice up your relationship with a home-made 3D printer
by Mariana Hurtado
Easy printing and 3D printing couldn’t be more different. Luckily, the Ultimaker 3 exists, and it dramatically reduces the chasm between these two concepts…if you can afford it.
Some of you might remember that my career as a 3D printer began when I built my own machine many moons ago and started up with my husband. Since then, I have learned a lot about the finer points of modelling, materials and their complex, individual temperature settings. It was a challenge; the learning curve was steep and our first attempts were often disappointing.
Today, it was a totally different story. I am at the digitec office and there is a large white box in front of me with «Ultimaker 3» on it. I’ve read a lot about it. It’s set to be the gold standard of 3D printing. It’s said to be faster, more sophisticated and just plain better than the competition. And I’m the one allowed to test it.
Alongside a roll of 3mm NinjaFlex in Sapphire, my test set-up looked like this:
The complex printer set-up is no more. Just open the box, take the printer out, plug in the cable – done. Being used to a complex process, I initially wasted a lot of time on finding out where to start, whereas I only had to follow the simple tutorial on the website.
Full of anticipation to get started, as usual, I covered the printing table with adhesive tape. Everything must always be calibrated before printing. I normally leave this to my print engineer, otherwise known as my husband. That’s why it took me too long to realise that the Active Leveling function only works with a completely empty printing table. So I removed the tape, and it worked. So far, so incredibly straightforward.
When I saw the dual extrusion system for the first time, my first thought was: «With two nozzles, I can print in two colours!» How unambitious of me.
The PVA filament eradicates several of the previous limitations of 3D printing. Polyvinyl alcohol (PVA) is also used for washing detergent capsules, which dissolve in warm water. You can see where I’m going with this.
Support structures are need to print complex structures. Removing them, however, is often extremely difficult and can damage the object concerned. This is not the case when using PVA. Simply place it in warm water to remove it.
A good example of the potential of this method is follows:
PVA works best when combined with PLA. Luckily, it’s an extremely common and popular material, which isn’t a limitation by any means, but it’s good to know.
We wanted to see how it handled an organic object, so I downloaded this amazing bust of a screaming woman, knowing that standard supporting structures could ruin it.
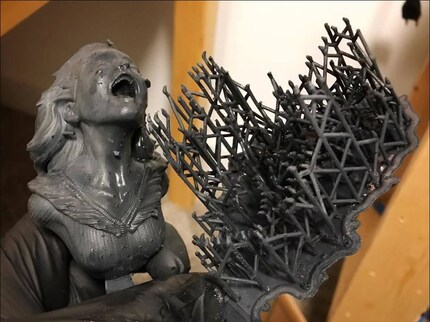
Thingiverse user visualg shows us the results without the benefit of PVA.
I added the digitec logo to the base and left it at that. Big mistake. Later, I found out the hard way – during printing – that something had gone wrong with my little modification. The slicer hadn’t worked properly and the support structures in that area had suddenly failed. At some point, it started printing again out of nowhere. Luckily for me, the model wasn’t damaged and the supports were back to normal in no time. This is why you should always check your surface normals again before printing. Really. However much of an expert you are, check before you print.
When the model is placed in water to remove the supports, not all of the excess material comes off, especially in small crevices, so a short extra rinse is required. It will be a bit tacky, as PVA is also the main component of some glues. As soon as it’s in its liquid form, you’ll be able to see why. If you don’t like sticky fingers, it’s best to wear household gloves.
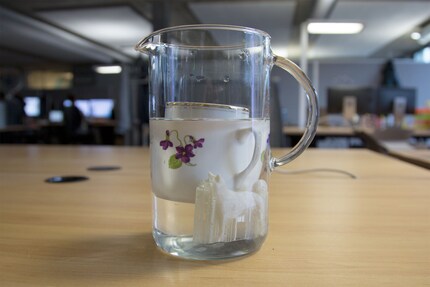
Sorry, Madeleine...
After I removed some remaining PVA with my bare hands, I ate a biscuit. The clear jug that we used to dissolve the supports belongs to Senior Editor Dominik Bärlocher’s housemate and I used Marketing Communications Specialist Madeleine Hager’s mug to hold the model underwater. If none of us dies in the next few days, we’ll know that PVA isn’t toxic. No-one had reported any symptoms at the time of writing.
Here at digitec, we test every possible toxic filament so that you don’t have to.
Only one extruder can print at any one time to avoid confusion, so when a material has finished a layer, the printer head moves to the corner to change the extruder. This tends to leave small traces of the material on the object, but they can be easily removed with minimal polishing and/or fine tuning.
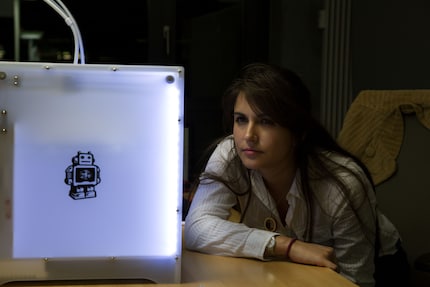
Although the Ultimaker 3 is fast, I have to work into the evening if I want to leave the object to print while I sleep
I know, I’m nitpicking. The benefits far outweigh this small detail, but pointing it out does no harm. You can also rotate the object so that traces don’t appear on the object surface.
Configuring printer settings used to be a science. You had to know the ideal temperatures and speeds for each specific material inside out. If it didn’t work, you could spend hours tinkering or doing extensive research.
Cura, Ultimaker‘s official slicer software, simply asks what materials you are using and does the hard work for you. The user interface is clear and easy to use. It’s a great addition to a printer with the same properties.
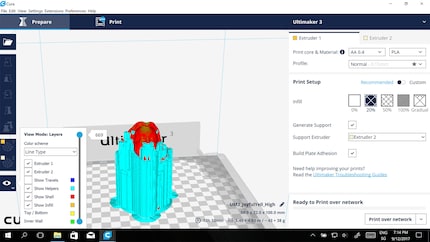
It couldn’t be easier
If the default settings limit your work, Cura has over 200 settings to tailor to your requirements. And it’s all available in an open source environment.
Drawbacks? I’m still looking for them.
The results of 24 hours’ work:
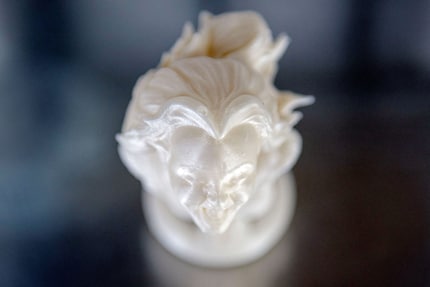
The printer’s quality setting was Medium
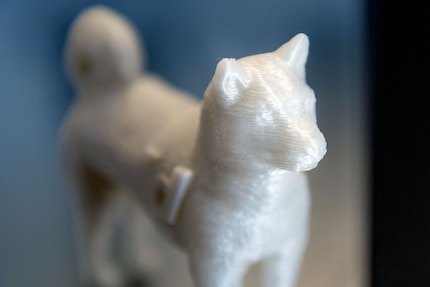
The «digidog» project was printed using the Low quality setting
In case you’re wondering:
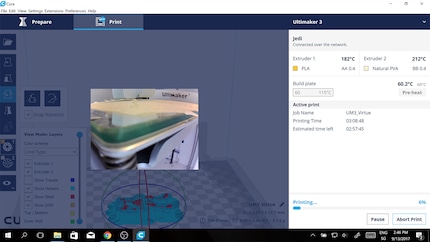
the integrated camera on the Ultimaker 3 enables you to monitor the printing from afar
This was my experience after 24 hours with the Ultimaker 3. It was amazing; so easy and I had so much fun. The difference compared to the self-made Prusa that I was used to couldn’t be greater.
After I shared all of this with my print engineer/husband, he seriously considered forgoing a sofa, a table and chairs and a cupboard for our new apartment and buying one of these printers instead.
That’s the only problem: the price is that of a large piece of furniture. But if you ask me, the Ultimaker 3 is worth its weight in gold.
And if that’s still not enough printing or money for you, there’s another version of the Ultimaker, which produces larger prints.
I might be a graphic designer, a Pokémon trainer and tech-savvy but I'm no creative writer. I'm on a non-stop quest against bad design. Since 2014, I call Switzerland my home.