
Background information
We'll set up a streaming PC for you
by Kevin Hofer

We've done it. After a long and hard build with many setbacks, the streaming PC is finally finished. Here you can find out how we got on with the assembly.
Phew, that was a labour of love, I tell you. After we were already in awe at the start, the PC brought us to our knees several times during assembly.
As we are building two systems in one case, we need the emperor of PC cases. We choose the Corsair Obsidian 1000D. It's perfect for our requirements. It's so big, Martin and I could easily fit two people in it - almost. You can read the short version of what we want to install in the following lines.
The first PC is Intel-based and is designed for gaming. With Intel i7-8700K 3.2 GHz, 32 GB RAM, 1080 TI and 4 TB SSD as well as 24 TB HDD, there is more than enough power to keep your YouTube or Twitch followers supplied with new content for years to come. The second PC is AMD-based and is used for streaming or recording. Ryzen 7 2700, 16 GB RAM, 2 TB SSD and an internal elgato streaming card are installed in the Mini-ITX PC.
As a highlight, the entire system is water-cooled. 24 fans provide supply and exhaust air.
We start with the centrepiece of the two PCs: mainboard, CPU and RAM. But I don't want to bore you with that. Anyone who has ever assembled a PC knows how it works.
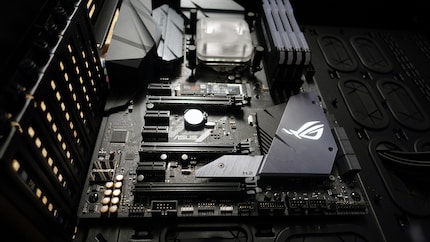
The installation is exciting. This is extremely easy thanks to the dimensions of the housing. Only the rear panel for the large mainboard doesn't quite fit. Only with a little force do we get the mainboard to sit firmly in the bezel.
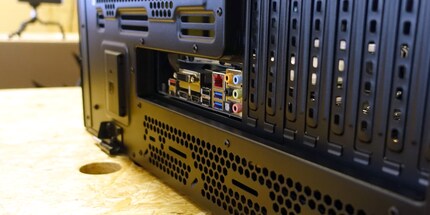
Next, we screw the fans and the radiator to the front. Here too, Corsair provides PC hobbyists with maximum convenience. We attach the cooling components to the extendable bracket. There are eight fans in front of and eight behind the radiator. We therefore rely on a push/pull system.
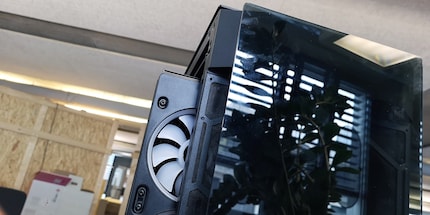
Of course, we editors also have to do something other than assemble PCs. That's why we don't sit in front of the case for eight hours a day.
Build day 2
We choose CableMod cables for the connections instead of the ones supplied. But you can't see much of the cables anyway. The housing is designed so that we can route them through holes in the rear panel to the back. This cleverly conceals the cable clutter. And the visible part of the cables is stylish after all.
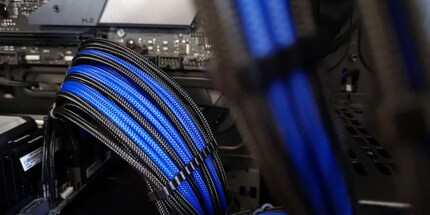
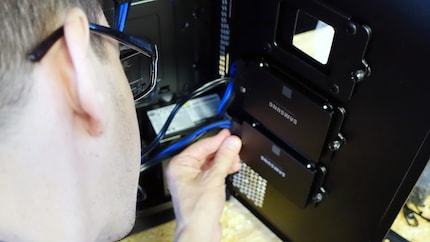
We place the HDDs in the slots at the back. You can't see them from the front either. It's a real relief not to have to screw the hard drives in place. That used to be an abomination for me. Corsair has come up with something special for the SSDs. The back, where the cable clutter is located, is accessible through a double door. There are six slots for the SSDs on the inside of these doors. Unfortunately, one of them is unusable as it is exactly at the height of the ITX power supply unit and the door can therefore no longer be closed. But it's no big deal, as we are "only" installing four SSDs.
Construction day 3
On the third day, we hit a wall. Or rather: against a radiator. We would like to install another radiator with fans at the top. Unfortunately, we don't have the space. We have to replace the 420 mm radiator with a 360 mm model. We therefore also have to change the pull-out bracket, as the current one only supports 140 mm fans, and of course the fans too. New 120s will also be installed at the top.
But that's not the only obstacle we encountered that day. We had another one during planning. Our colleague Christian Seeholzer, who put together the components, made a mistake. Instead of a graphics card, we wanted to install the streaming card in the streaming system. Unfortunately, the Ryzen 7 2700 doesn't have a graphics card on the chip. So we have to reschedule and also rely on Intel for the ITX system. Now we have to wait until the new components arrive.
Build day 4
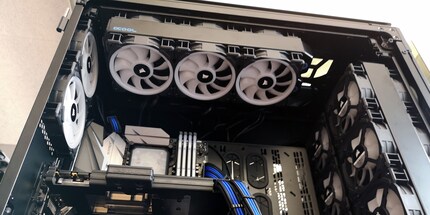
After a few days, we have all the parts with us. Now we have to remove the AMD mainboard again, prepare the Intel mainboard with CPU, cooler and RAM and install it. Then install the radiator at the top together with the fans. Speaking of fans: there are 24 of them. Each fan has two cables; one for the RGB hub and one for the controller. That makes 48 cables. Here, too, we forgot something in the planning. Namely the RGB hubs. These then have to be connected with another cable.
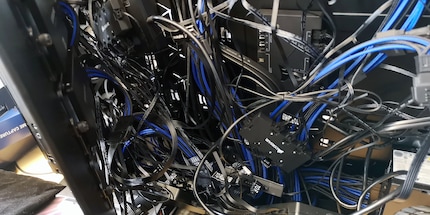
So we have a hell of a lot of cables. But don't worry, the front of the case looks very tidy. The back, on the other hand, is a mess.
Construction day 5
Now it's time for the water cooling. We're particularly looking forward to this because we've never done it before. That's why our colleague Christian Seeholzer is supporting us. Although "us" is not quite correct. It's actually just me. Martin went on holiday before the fourth day of construction and left me alone with cable management. You'll pay for that, Martin!
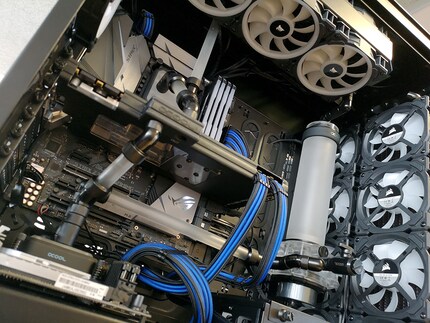
To make it look better, we use hard tubes instead of hoses. Meticulous planning is important with hard tubes. If the tubes are only slightly slanted in the connectors, the PC takes an involuntary shower.
As Christian doesn't have a great deal of experience with hard tubes either, we plan a simple system with mostly straight tubes. That way, nothing should go wrong. We create the conditions for straight tubes with various fittings.
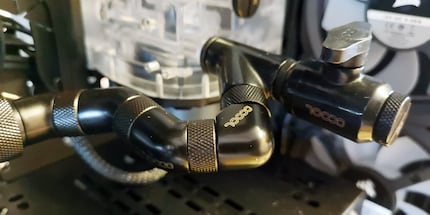
It is not always easy to make the connections exclusively with fittings. At certain points we bite our teeth out. The last connection between the pump and radiator in particular brought us to the brink of despair. After a few hours, we give up and decide to postpone the last connection until another day.
Construction day 6
At the next meeting with Christian, we decide to adjust the height of the pump slightly. We manage to make the connection between the radiator and pump fairly quickly. We also tweak the other connections. All that's missing now are the tubes.
Construction day 7
Today is the last day of the competition. Due to the various setbacks, we have fallen behind schedule. This motivates me to cut and bend the tubes on my own. I measure the distances, saw the tubes to the appropriate length and round off the edges. The most difficult part is attaching the fittings. They are very tight. Which is actually a good thing, as they are supposed to be tight. It's a real struggle until I get them attached to the tubes.
Construction day 8
Now all that remains is to top up the coolant. As the pump does not have an inlet for the liquid, we have to fill it in via the radiator above. Everything goes well at first until we notice that some liquid is leaking out. Did I make a mistake when fitting the tubes? After a quick search, the all-clear is given. It is leaking, but it is leaking where we are filling the liquid. The cause is also quickly found. The sealing ring was missing. After that, everything runs smoothly and we can finally start putting it on.
Construction day 9
So, now comes Montezuma's revenge. Martin actually thought that he would find the finished streaming PC after his holidays. But the good gentleman was wrong. Kevin made sure that the final touches were left to him. But what the heck; nobody has anything against another round of tinkering.
Setting up the two built-in PCs should be a piece of cake compared to Kevin's tube-laying job. However, there are still a few pebbles in the way. Kevin actually forgot to connect a power cable to the ITX system. Or we have an in-house troll who secretly sabotages our work at night. In addition, an RGB hub seems to have given up the ghost, as some of the fans are refusing to put on a rainbow show. Fortunately, the guys from product management help us find the broken part.
After that, everything goes quickly; the Elgato Game Capture 4K60 Pro is installed on the ITX system, some bios settings are made, Windows is loaded onto the systems from the USB stick, updates are run and the latest drivers and elgato software are installed. The RGB lighting causes more problems than expected during setup. You can read more about this in Kevin's comment below.
Of course, we're still testing the PC and you can join us. Our colleague Philipp Rüegg needs the device in one of his future Let's plays.
From big data to big brother, Cyborgs to Sci-Fi. All aspects of technology and society fascinate me.
Interesting facts about products, behind-the-scenes looks at manufacturers and deep-dives on interesting people.
Show all