
Background information
Learning with Lego: «Planet Earth’s in the kitchen!»
by Michael Restin

The Explorer StarSense LT 70 AZ is a beginner's telescope that alternates between pleasure and frustration. The star in this case is the StarSense app, because it cleverly navigates beginners through space.
At first glance, what belongs together comes together: a beginner's telescope and a beginner. I love looking at the night sky, but apart from the moon, the Big Dipper and Cassiopeia, I don't recognise much. But a telescope doesn't make everything easier. I have to align it, track it and readjust it again and again. That can be frustrating.
At second glance, I'm a spoilt beginner. Because I was allowed to test the Celestron NexStar 6SE for a few weeks. This is almost eight times more expensive and motorised, it can track objects automatically.
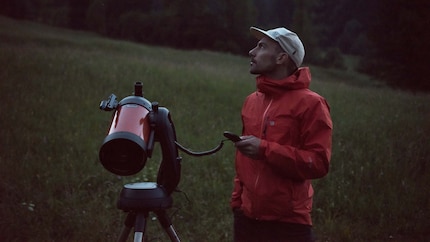
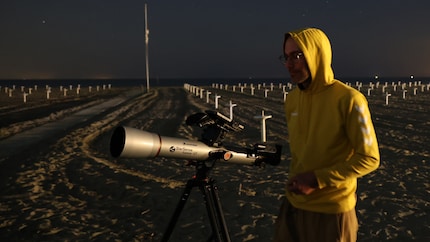
As a result, I have to lower my expectations for this test. I'm not alone in the dark, but with my colleague Stephan. As a physicist and amateur astronomer, he knows his way around the night sky. Together, we scrutinise the Explorer LT 70 AZ on cold Zurich evenings in March and warm Italian nights in April. The key question: Do I need Stephan - or is the StarSense Explorer with its app enough? After all, the packaging promises that no experience is required to find your way around.
The Celestron StarSense Explorer LT 70 AZ looks like what beginners imagine a telescope to look like: a long, thin telescope. It belongs to the so-called refractor telescopes. They employ lenses and are rich in contrast. However, they do not capture very much light. Unless they cost a lot of money.
This is not the case with the Explorer LT 70 AZ, so I shouldn't expect too much. It is primarily suitable for observing our planets. In other words, the Earth's direct neighbourhood in space. Thanks to Stephan, I've already learnt what dimensions we're talking about with the Lego model.
The box is large, but surprisingly light for the promised contents. In addition to the telescope, the following accessories are included:
Then there is the lightest and most important content: a card with a code that I need to be able to use the StarSense app on up to five devices. There is also the Basic Edition of the Starry Night software for Windows or macOS, which I can also install using a download code.
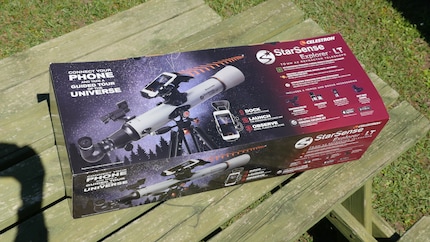
The telescope should be just as easy to set up as it feels. I set up the tripod, which seems wobbly at first. As soon as I screw on the storage tray in the centre for accessories such as eyepieces and the Barlow lens, it is more stable.
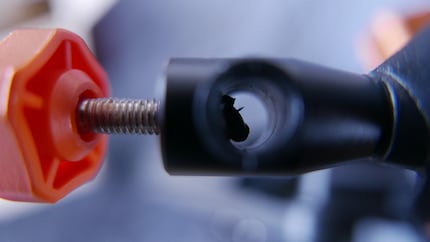
I am less happy with the black hard plastic holder into which the telescope is screwed. It is not cleanly finished, with plastic parts protruding here and there. To be able to thread in the rod for the height adjustment, I first have to punch out the corresponding opening.
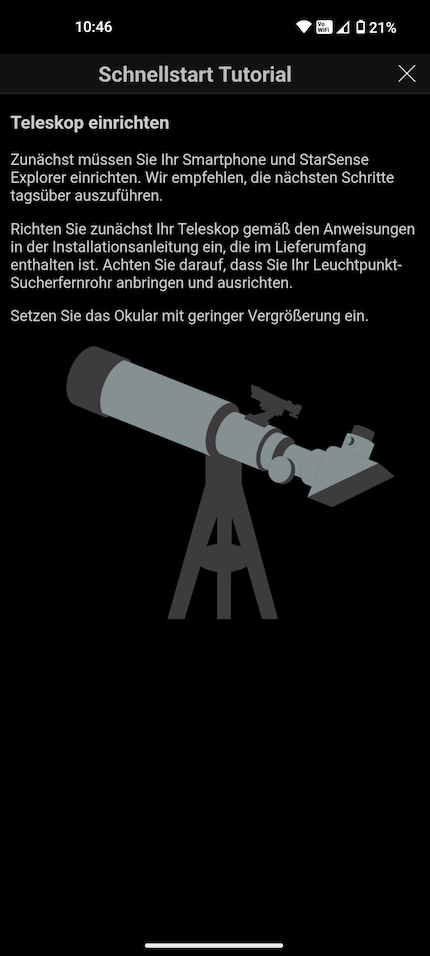
On the telescope itself, I screw on the finder scope and the smartphone holder. I also attach the angled mirror, which allows me to look into the eyepiece from above. First I want to orientate myself. The instructions advise: «Always use your eyepiece with a low magnification power (25 mm) to find the desired target. You can always switch to your high magnification eyepiece (10 mm) later.»
More is not more in this case. With the 25-millimetre eyepiece I achieve 28x magnification, with the 10-millimetre eyepiece I am at 70x. The Barlow lens doubles the magnification in each case. The maximum magnification I can achieve is 140x. But that's not so important.
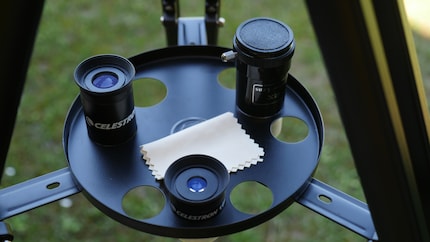
The higher the magnification, the darker and more difficult it becomes to find objects in the sky and keep them in the field of view. The earth rotates quickly and with the slightest touch of the telescope I can be light years off again. To be able to find anything at all, I first have to calibrate the viewfinder telescope and the app.
I am already familiar with this device. I have to align the viewfinder telescope, previously known to me as a star pointer, once to get started. This also works during the day. And it makes sense to familiarise yourself with the telescope while you can still see something. For calibration, I look for a target, in my case a chimney top on the opposite side of the city, and centre it until I can see it in the middle of the eyepiece.
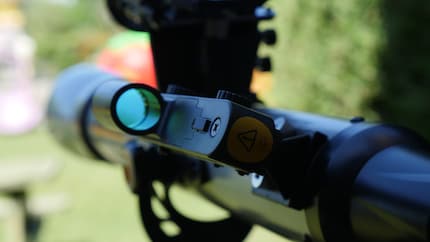
Then I switch on the battery-operated finder scope. A red dot appears, which I can also move horizontally and vertically using two wheels until it points to the same chimney top. It is now calibrated and easy-to-find objects such as the moon, Mars or Jupiter can be focussed on in the night sky. If I can see the object through the viewfinder telescope behind the red dot, I should also be able to see it through the eyepiece (or at least find it nearby). The app promises even more orientation in combination with the StarSense dock.
To be honest: I don't have overly high expectations when I download the 367 MB app for Android and activate it using a code. It is supposed to navigate me through the night sky in conjunction with the telescope.
I remember calibrating the higher-quality NexStar 6SE telescope as a tedious process. I had to aim at two or three stars using the remote control, which the device used to calculate its position and then navigate to objects in the night sky using its automatic Goto function. Sometimes this worked better, sometimes worse. And as soon as I repositioned the telescope, the game started all over again.
The StarSense Explorer LT 70 AZ has no motor and no Goto function. Instead, it has a dock for the smartphone and the StarSense app. And it quickly becomes clear that this is a very good thing!
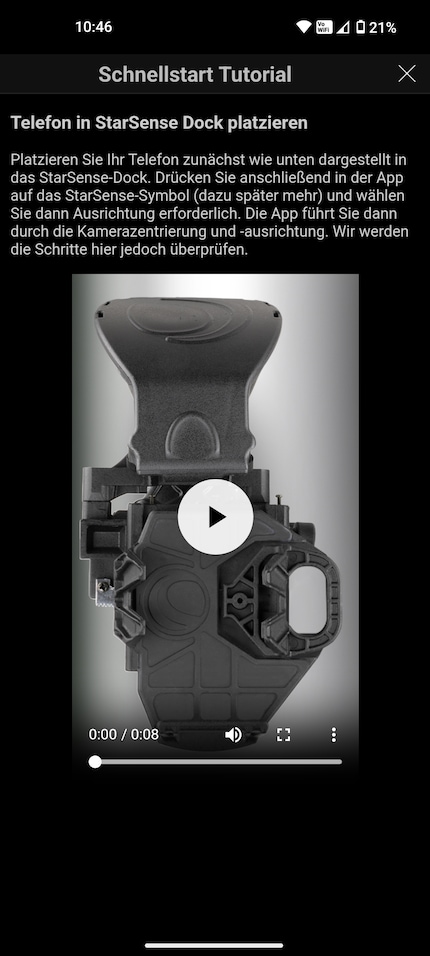
I grab the lightweight telescope and take it to Stephan. Together, we mount my smartphone in the holder and remove the cover cap at the end of the telescope. There is a mirror underneath and our first task is to position the smartphone so that its camera provides a complete image via the mirror.
When the camera is correctly aligned, the app can constantly analyse celestial objects. To guide us to our destination, we also need to calibrate it. Stephan and I choose the uppermost light at the top of the Uetliberg tower as our target. We then move the camera image so that this light is also in the crosshairs. Then we're ready to go.
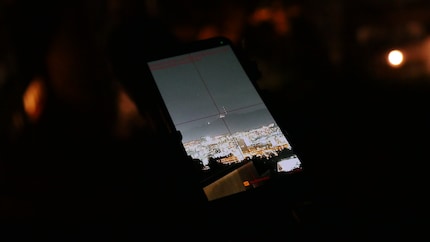
And the app makes it easy for us: it presents a list of the objects that can be seen that evening. It also includes the rising and setting times of the planets and information on whether the objects can be found near a city despite light pollution or only in dark skies.
Stephan only has to look up to orientate himself and show me exciting things. Without him, I would have to rely on the information in the app, which contains tips on what to watch. We are both impressed by the target search. Once a celestial object has been selected, it shows us in which direction we need to move the telescope. Sometimes we have to wait a short time for the app to re-determine the position using a long exposure. But then it often leads us more precisely to the target than I remember from the Goto automatic system.
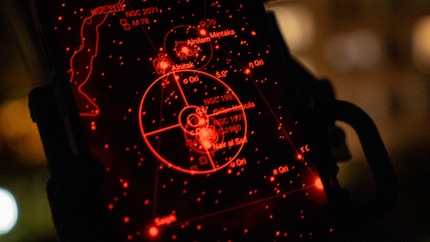
Basically, StarSense works well and is very useful. You don't need a high-end smartphone for it. I use a first-generation Nothing Phone. Celestron maintains a compatibility list and specifies Android 7.1.2 or an iPhone 6 as the minimum requirement
Despite this, there are some complaints online that models on the list did not work. On the first evening, we are still a little irritated because the app loses its orientation relatively often. Before the second one, I clean the camera lens of the smartphone and it works much better afterwards.
We start during the planetary parade at the end of February, when Mercury, Venus, Mars, Jupiter, Saturn, Uranus and Neptune are lined up in the sky. The city shines brightly, as does the moon. It is the logical first target and can be found quickly even without a finder scope or StarSense Explorer. If it shines brightly, the app recommends searching for more distant objects. It does not tolerate too much moonlight. At the very least, it then finds it more difficult to identify objects close to the moon.
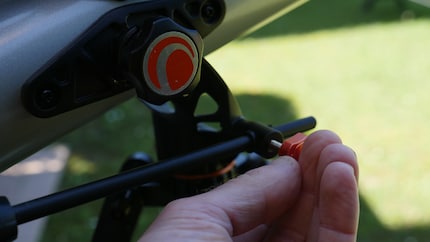
What is also difficult is handling the telescope itself. It reacts sensitively to touch and always drops slightly when we take our fingers away to look carefully through the eyepiece. This can be compensated for by the fine adjustment - a rotating handle. But there are also times when I get lost in space and have to start all over again.
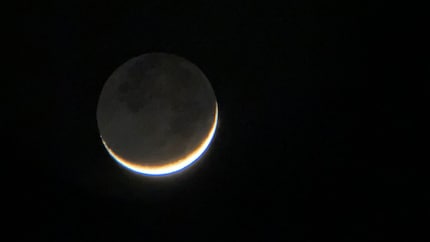
It is definitely advisable to use the 25-millimetre eyepiece at the beginning. This gives you some time to look and adjust before the moon or Jupiter have disappeared from the field of view. Tracking is tedious. I occasionally get frustrated and leave the field to Stephan, who brings the objects back into view. He draws my attention to chromatic aberration. An imaging error in lens telescopes that occurs when light is refracted. You can see slightly blurred colour edges. You can get an idea of what is meant in the moon image below.
I'd love to show you a real view through the eyepiece. But we quickly discarded the plan of attaching Stephan's Celestron NexYZ 3-Axis and taking photos through the eyepiece with the smartphone. Far too shaky, no chance. Theoretically, a camera could also be connected via a T2 adapter. But we don't have one and I wouldn't expect anything from it in this combination. This telescope is for looking, not for taking photos. In the end, we managed to take a shaky snapshot with the smartphone through the eyepiece. It looks a little better live, the moon is easy to observe. But the comparison with the smartphone photo through the eyepiece of the NexStar 6SE still speaks for itself.
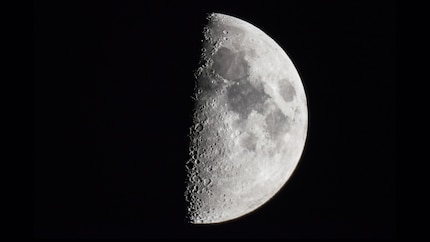
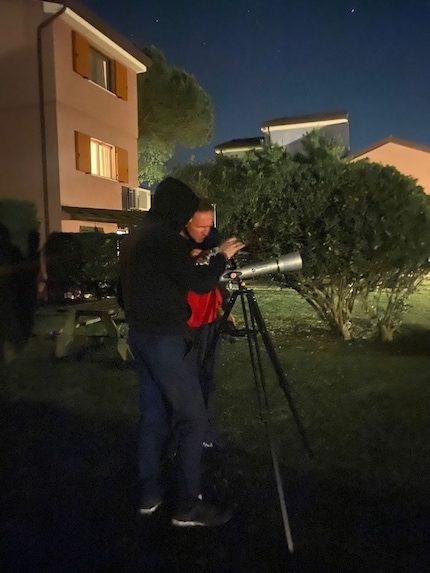
In spring on the Adriatic, I'm glad I packed the telescope in the boot. I only really realise how practical the lightweight StarSense Explorer is when I set it up in different places every day and never have to recalibrate it despite the transport. Simply place the smartphone in the holder and the app guides you to your destination.
Since Stephan is also in Italy, we continue our search together. Sometimes on the beach, sometimes in front of the house and, of course, never under ideal - i.e. dark - conditions here on the densely populated coast. But we no longer have any ice fingers. And we are getting better and better at aligning the telescope.
With the 10-millimetre eyepiece (70x magnification), the stripes of Jupiter can be seen and the Galilean moons can also be seen nicely. I noticed that the descriptions in the app are not always up to date: It talks about 67 known moons of Jupiter.
This is the figure from 2003, but the number has since risen to 95. Not that it would make any difference in practice with our telescope - we won't discover Jupiter's 96th moon with it.
With the 2x Barlow lens and the maximum magnification of 140x, it is really difficult to find, focus and track objects. We catch the moon with it and pant after the planets for a fleeting glimpse. I don't enjoy that. After a short time, we take the doubler out again.
Stephan has another mission with the telescope: to find the globular star cluster Messier 3 (M3). There are 500 million stars within 5 light years of each other, he explains. We have exactly one at this distance from Earth, Proxima Centauri. But M3 is 33,920 light years away and therefore almost invisible.
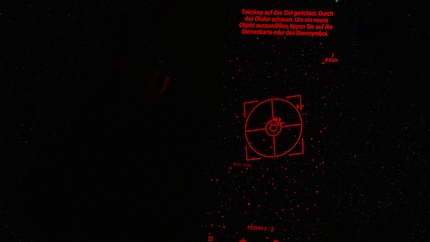
The app says that with binoculars, M3 can be seen as a «bright, dark spot». Viewed through a telescope, it should take on a three-dimensional quality. M3 is listed as one of the «objects with a challenge». Stephan accepts it and finally finds the target. It is indeed a «bright, dark spot», surrounded by a few more recognisable stars.
I have to take my time, change my perspective and, above all, let the words sink in as Stephan tells me what an incredible spectacle of light is taking place out there. What I can see doesn't look spectacular. The telescope has reached its limits. At least in this light-polluted environment.
The Explorer LT 70 AZ is what it is: a beginner's telescope. How far would I have got with just the app? Even though the guidance works well, I would probably have had to search for Messier 3 for a long time and put the sometimes wobbly, sometimes stubborn telescope in the corner after one look at the moon and planets. But it's a start - and stargazing is more fun together anyway.
Considering the price, I can't really criticise the telescope. Nevertheless, it's a shame that the gap is so wide. On the one hand, there is the easy-to-use app, which could lead you to your destination at any time. On the other hand, the difficult-to-control mechanics, which more than once spoilt my enjoyment. Fortunately, the StarSense function is also available on higher-quality telescopes from Celestron.
If I could, I would award four planets. Because they don't shine, they bask in the glow of the stars. With the Explorer LT 70 AZ, the star is not the telescope, but the StarSense function.
This very well-functioning navigation via smartphone outshines the weaknesses of the telescope. Guidance is simple. Aligning the sensitive tube correctly, on the other hand, can be difficult. Enthusiasm and frustration alternate.
Anyone who is hooked on this hobby will sooner or later reorient themselves - but won't want to do without the StarSense function. Fortunately, this is also available on higher-quality telescopes from Celestron. Considering that you can't expect much more from an entry-level telescope in this price range, StarSense is enough for four stars.
Pro
Contra
Simple writer and dad of two who likes to be on the move, wading through everyday family life. Juggling several balls, I'll occasionally drop one. It could be a ball, or a remark. Or both.