
Milling, printing, engraving: Is the Snapmaker the all-in-one solution?
With Snapmaker, you can 3D print, laser engrave and CNC mill - all for less than 900 francs. Unfortunately, not all that glitters is gold.
The Snapmaker Kickstarter campaign raised over two million US dollars in 45 days. This makes it the third most supported 3D printer in the history of Kickstarter. The 3D printer has now made it into series production and we have it in our shop. I can't resist the opportunity to try it out.

Easy to assemble
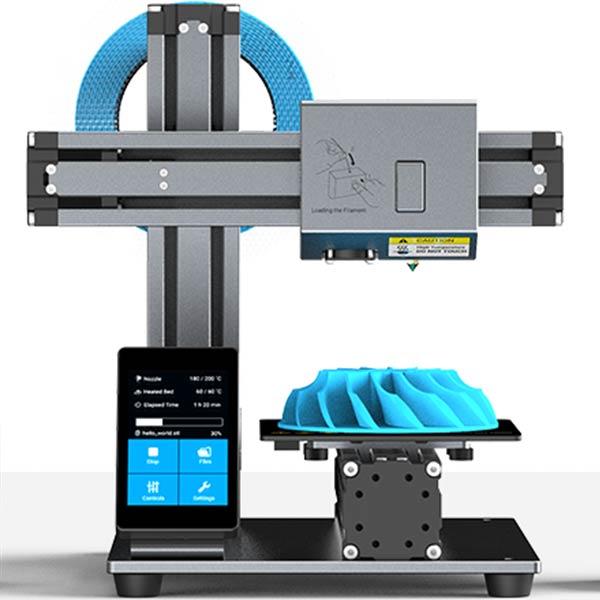
I have to assemble the Snapmaker first. Thanks to the instructions provided, this is child's play and takes just 20 minutes. I then have a fully functional device with a 3D printing module. The scope of delivery also includes two other modules. With these, you can transform the Snapmaker from a 3D printer into a CNC router or laser engraver in just a few minutes. But first I'll test the printer configuration.
My first time with ABS
Since I have only ever printed with PLA and the Snapmaker has a heated print bed, I decided to take my first steps with ABS. In contrast to PLA, a heated print bed is mandatory with ABS. This is the only way my prints adhere and I can reduce warping to a minimum
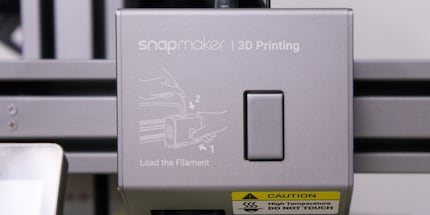
Loading the ABS filament proves to be a real feat of strength. The button for inserting it is so hard that I only manage to load the material with great difficulty. But after a few attempts and even more cursing, the filament is finally loaded.
Then I have to calibrate the build plate. This works via the touchscreen and is very intuitive. When I continue to use the Snapmaker, the operation via the screen regularly freezes. To get it running again, I have to restart the device each time.
For the test, I'm printing some parts that I need for a DIY 3D printer project. I want to build a RepRap printer myself in the next few months. To do this, I need some ABS parts from a 3D printer.
I'm using Snapmaker 3D for the printing software. It has a similar structure to Cura, which I usually use. It also keeps freezing up, so I have to restart the printer for every new project. This is quite annoying and I have no idea why it happens. The firmware and software definitely need to be revised.
I connect the printer via USB. I print a total of three parts for the test. I don't have to rotate or otherwise optimise the objects first. Snapmaker 3D inserts all the parts correctly on the virtual build plate. Now I just have to specify the material type and temperature. I realise that the print bed can be heated up to a maximum of 89 degrees Celsius. The FAQ on the Snapmaker website only states 80 degrees Celsius. I have no personal experience with ABS, but I have read that sometimes a temperature of 110 degrees Celsius is recommended for the print bed. Let's see if it works with a lower temperature. To ensure that the print adheres securely, I spray the build plate with hairspray and also print a brim. I start the print.
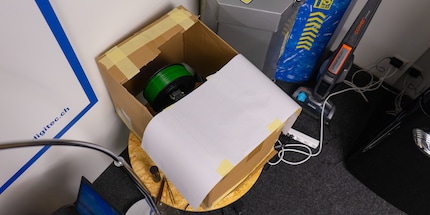
The print bed takes a very long time to heat up. It doesn't even reach 89 degrees. It stops at 85 degrees, which is why printing doesn't even start. I therefore stop the process and start it again at 85 degrees. Now the print does start, but after a few minutes my print comes off the printing plate. As I don't have a separate room for printing, the printer is in our coffee corner. There is always a gentle breeze and the temperature fluctuations are relatively strong. That's why I build a makeshift cover for the Snapmaker out of leftover cardboard.
This even allows the print bed to heat up to 89 degrees and my print adheres. After just over two hours, the first part is ready. However, despite all the precautions such as the heating bed, hairspray, brim and cover, it didn't work out completely without warping. I couldn't manage the other two parts I was printing without warping either.
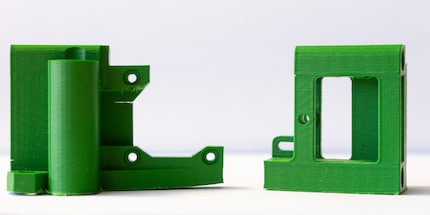
However, I am satisfied with the overall quality for the selected layer thickness of 0.2 millimetres. As the Snapmaker has a lot of functions, but I don't have that much time to test it, I'm still trying PLA prints.
What about PLA?
I choose the Dancing Groot as my subject, which I have already printed with the Wanhao Duplicator i3 Mini. So I have an object for comparison. Of course, I choose the same settings and the same filament.
The quality completely convinces me. As with the i3 Mini, the filament is a little frayed with Groot's hair. To prevent this from happening, I would probably have to print a little slower. But the result is more than sufficient for the selected speed.
Playing with lasers
Now it's getting difficult for me. I have no experience with CNC milling and laser engraving. The first thing I have to do is replace the print bed with the build plate for engraving and milling and screw on and connect the module for engraving. This is done within a few minutes and the Snapmaker is ready for its next task.
According to the manufacturer, wood, bamboo, fabric, leather, paper, acrylic and other materials can be engraved. However, metal, glass, transparent and reflective materials and similar materials cannot be engraved. I'm going to try engraving paper first. Hopefully I won't set the laser too high and burn down our headquarters.
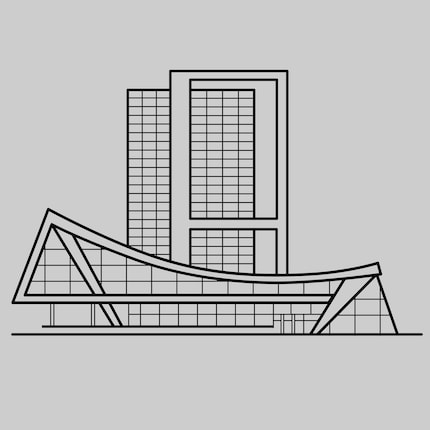
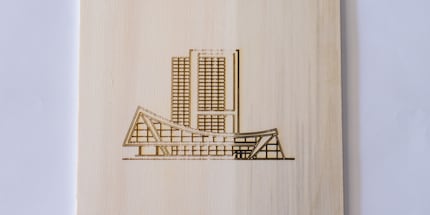
I decide on the Biel Congress Centre as the subject. Have you finished laughing? I would like to continue. The reason is because A. I'm proud of Biel/Bienne - there should be - and B. I think the Kongresshaus is architecturally extremely successful - there should be that too. This is what my template looks like.
I fix an A4 piece of paper to the panel using the enclosed fixing aids. The aids are aluminium parts that can be attached to the building board using screws.
When milling, I work with the Snapmakerjs software provided by Snapmaker. I connect the device to the notebook via USB and open the programme. It only recognises my notebook after I have manually selected the connection.
The software is not only the interface for laser engraving, but also for milling. Once I have connected the printer, I can select the engraving function via a tab on the page. I upload my image here and can then adjust the size and position. As soon as I'm happy with this, I create the G code. This tells Snapmaker what to do.
Once I have created this, I still need to define the working origin. This is important so that my engraving ends up in the right place on the paper. To do this, Snapmakerjs activates the laser on a low setting. From here on, I have to work with laser safety goggles to protect my eyes. Of course, I have also moved my workstation from the coffee corner to a storeroom in the basement so that nobody blinds me. I can now use the programme to control the axes and set the work origin. As soon as I feel that I have found it, I set it and use the "Execute limit" option to see whether my image is within the limits. If it isn't, I can always touch it up. This process is tedious, especially as I find it very difficult to recognise the laser beam at this low level.
But it doesn't have to be that precise for my experiment, as my A4 paper fills the whole plate anyway. I therefore decide to start the engraving process. But first I have to set the laser power. Due to a lack of experience and because I read in some articles that 75 per cent is recommended, I decide to go for it.
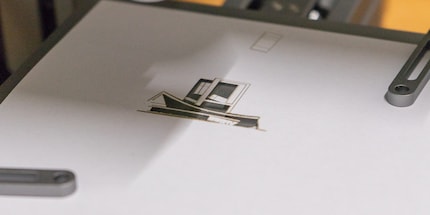
The smell of burning paper hits my nose right at the beginning. Don't worry, nothing is burning (yet). The laser heats the paper, so the smell is normal. After about ten minutes, it becomes clear that 75 per cent is probably a bit too strong, because the entire inside of my picture detaches from the rest of the paper. A lower laser power is probably better for paper. However, I don't want to try again with paper, but with leather. I sacrifice my belt for the test.
I try again with the same settings, clamp my belt and start the process. Strangely, it no longer smells of burning. After just under 25 minutes, the Snapmaker is ready. However, there is no sign of the Biel Congress Centre anywhere in sight. Only when I hold the belt under the light and move it a little can I vaguely recognise the contours of my picture. My second attempt is also a complete failure.
I try again. For some reason, the programme is no longer responding. I restart Snapmaker and Snapmakerjs. Now I can make changes again. Apparently the programme has hung up. I am trying to reproduce the error. It's actually the case that I have to restart Snapmaker and Snapmakerjs after every job I've done if I want to submit a new job. Snapmaker really needs to improve this.
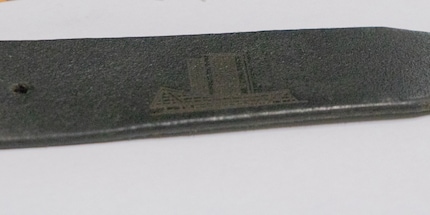
After discovering this bug, I try again with the engraving of the Congress House on my belt. Right at the start, the smell of burnt material is perceptible. I interpret this as a good sign. And indeed, this time after just seven minutes, I am the proud owner of a belt with the Kongresshaus engraved on it - even if my colleague Philipp Rüegg laughs at me maliciously. He's just jealous that he doesn't have a Sulzer skyscraper on his belt. Although the subject is not so clearly visible on the dark material, the level of detail is amazing if you look closely. The windows are very recognisable. I could probably even have set the laser to 100 per cent to make it stand out even more.
To see how it comes into its own on light-coloured material, I print the subject on a piece of chipboard. I then put it on Philipp's desk. That's what he gets for laughing at me. In contrast to the 40 mm x 40 mm, I now set the size to 100 mm x 100 mm. I set the laser to 75 per cent thickness.
On the large plate, it turns out that the Snapmaker doesn't always manage to engrave evenly. In certain places, the lines are not engraved, which results in an unclean overall impression. I therefore carry out the engraving a second time over the existing one. Of course, I have to restart Snapmaker and Snapmakerjs to do this. This time I select 100 per cent. Now the lines are drawn continuously. I try again and set it to 100 per cent right at the beginning. Even so, certain lines are not engraved cleanly. Apparently, Snapmaker always needs several attempts before an image is actually engraved cleanly. What a shame, I would have liked a consistent result the first time.
Now it's time to mill
Finally, I test the CNC milling. To do this, I have to swap the laser module with the CNC module. I can leave the build plate on. As with laser engraving, this is the first time I've used CNC milling, so I choose less ambitious subjects. According to the manufacturer, the Snapmaker can mill wood, acrylic, PCB and carbon.
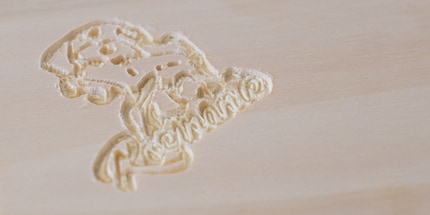
I decide on a logo for the Roci, the crew's spaceship from the "Expanse" book series. I convert the image into an SVG file. I can import this into the CNC function of Snapmakerjs. Now I just have to create the G-code and load it. As with laser engraving, the next step is to define the work origin.

I have to do this manually again. I use the menu to control the CNC drill over the build plate. As soon as I have the feeling that the drill is positioned correctly, I set the working origin and move the limits. If everything fits, I still have to set the Z-axis. To do this, I move the drill to 0.01 millimetres above the wood. This reminds me a little of calibrating a 3D printer. Now I just have to start the printing process.
After about 20 minutes, the Snapmaker is ready. Of course, I kept an eye on the process the whole time. Even during the milling process, I had the impression that I had overshot the mark. The logo is too complex. The result of the milling was disappointing. The lettering is legible, but the pinup depicted is not recognisable. Too bad, I would have liked to have placed a wooden panel with the Roci logo on my otherwise already chaotic desk.
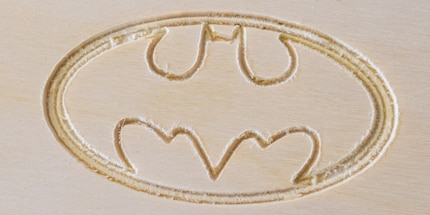
I'll try something else. The Snapmaker instructions show a wooden lid with a Superman logo. I'm definitely not going to mill that - is there a more boring superhero than Superman? But a Batman logo is very appealing. I'm preparing it for CNC milling. The logo isn't particularly complex and should be feasible for the Snapmaker.
This time the process takes less time. The Snapmaker is finished after 6 minutes. The logo is clearly visible, but the details are not cleanly milled out. This can be seen in the ears. The Snapmaker has milled them out completely.
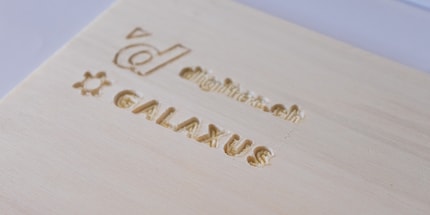
Last but not least, I test the CNC milling with text. I use the digitec and Galaxus lettering with logos for some surreptitious advertising. Although the lettering and logos are easy to read, they are not milled out completely cleanly. The smaller digitec lettering in particular is unclean in the details.
There is no such thing as the jack of all trades
The Snapmaker leaves me somewhat perplexed. On the one hand, I'm excited about the possibilities. Engraving, milling and 3D printing in one device is simply great and takes up very little space. On the other hand, you have to compromise on quality. The quality is inadequate for ambitious hobby engravers and millers. It is also difficult to set the working origin for both options. I would have liked a different solution here. The only thing that convinced me was the quality of the 3D printer. I still had to struggle with warping with ABS, but if I had spent a little more time with it, I would certainly have got to grips with it.
Snapmaker also needs to improve the firmware and software. The programme and the printer hung up too often and it's very tedious to restart everything every time.
So is Snapmaker worth the money? Difficult. If you only print 3D, it's better to save yourself the extra charge for this 3-in-1 variant. Even if you primarily want to engrave and mill, I can't recommend the Snapmaker. The quality in these areas is too poor for that.
From big data to big brother, Cyborgs to Sci-Fi. All aspects of technology and society fascinate me.

